

- Walking Dead Saints and Sinners Best Weapons - July 31, 2023
- Pistol Whip Style Guide - June 8, 2023
- Bonelab Best Mods: Our Top 16 - February 15, 2023
Adding your music to Pistol Whip requires converting the WAV file formats of your music to one called WEM, and then manually replacing the original track with your own.
It’s important to note you can’t match your music with the rhythm of Pistol Whip’s levels as you can in something like Beat Sabre. The music will play as you blast through each level, but you won’t be playing to the beat of the music.
Nevertheless, I’ll provide you with instructions on how to add custom songs to Pistol Whip experience the best you can, and I’ll give you some helpful tips to help you get the most out of the feature.
How to Add Your Songs
As a Pistol Whip fan, you’ll be intimately familiar with the game’s pumping soundtrack, but what about if you want to add your music to jam along to as you blast neon soldiers into dust?
Before doing anything, create a new folder on your desktop, and then add all the music you want to be used within the game. This can feature as much or as little music as you like.
Pistol Whip uses a different file format from the WAV music file format most are used to. This file type is called WEM, so you’ll need to convert your music from its original file type to this new one to enable its use in the game.
Doing this requires a separate piece of free software called WWise. The developers used this software to program the music and sound effects into the game.
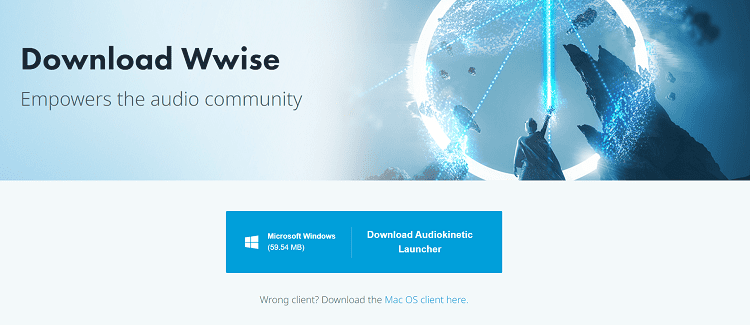
You can download the installer from the official website here. If you’re on a Mac, a Mac OS version of the software can be downloaded from the smaller link below. There is a paid version of this software, but thankfully, you’ll only need the free version for what you need to do here.
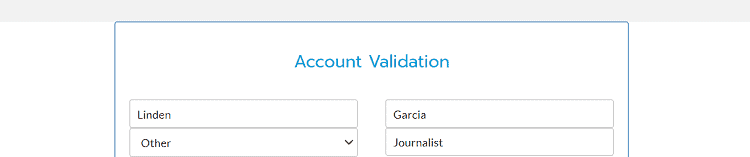
Clicking the link above will prompt you to create an account. After adding your details and verifying your new account via email, you’ll be asked to add a little bit more information about yourself and your uses.
Now, the site does ask you a couple of questions such as your profession and the size of a presumed business: generally, the software is used most by audio technicians. Just enter whatever you like in these boxes if none of the options fit you.
Once that’s out of the way, you’ll be brought back to the download page that will link you straight to downloading the file. Once you’ve downloaded the launcher, open it, agree to the terms and conditions, and wait for it to install.
The program will launch automatically upon installation, and you’ll now need to log in with the account you just made using the blue button in the top right of the screen. Then click Wwise from the panel of options on the left and then the blue install button.
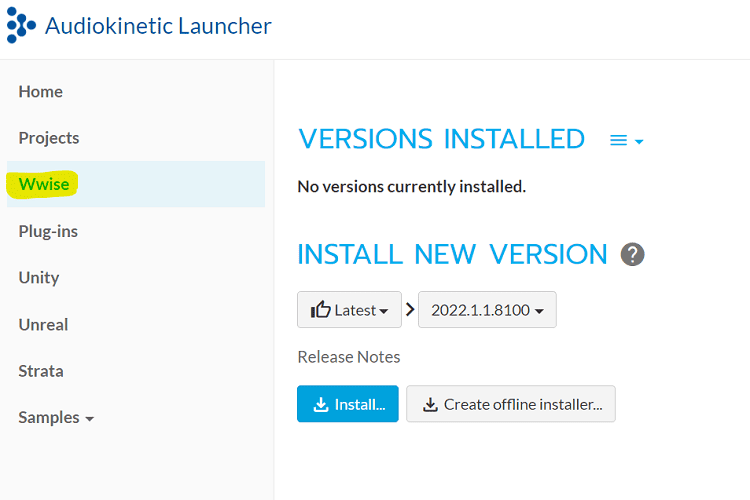
Once installed, click the blue launch tab. You’ll now be prompted to create a new project: name your project and click create. Next, you’ll need to navigate to the music folder you created earlier to load your tracks into the software.
Click project from the top left of the software screen, then import audio files, and now navigate to your folder and click select folder. If you only have one song, as I have for this example, click select file instead and choose your track.

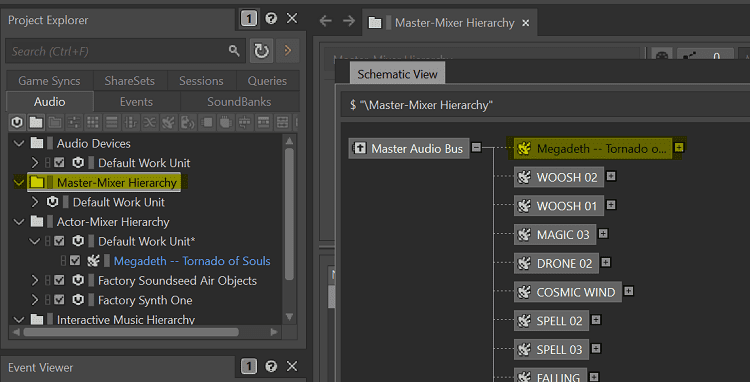
Having done so, you won’t see your files appear straightway. You must navigate to the project explorer window on the left-hand side of the screen, right-click on Master-mixer hierarchy, and then Show in schematic view.
Then click the little plus symbol next to the Master Audio bus tab in the schematic view window, and you’ll see your song appear next to it.
Now for the important part: converting the file. Clicking on your song will bring up its own window, and within that window, click the conversion tab and then the small box with the arrow to bring up the main conversion window.
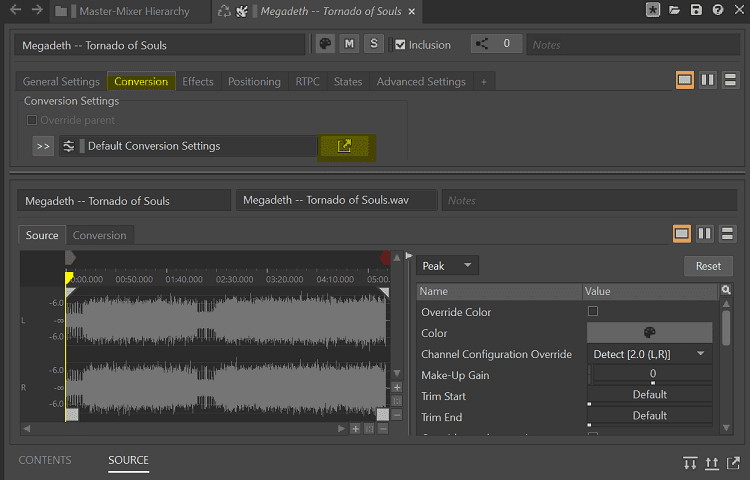
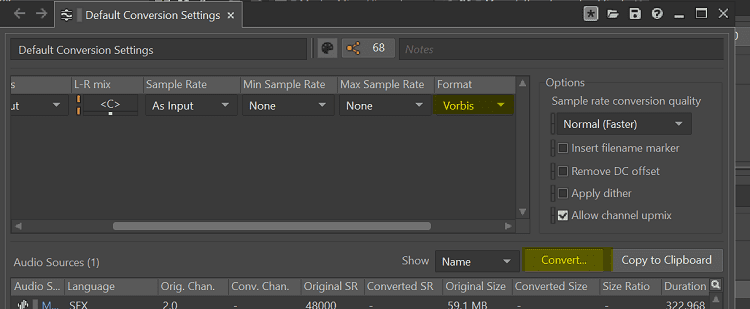
Scroll across the window horizontally, and under the format dropdown box, select Vorbis: this will convert the file from WAV to WEM. Now hit the convert button and confirm, and the file will be converted and stored.
Unfortunately, there’s no option to select a storage location for the file. It will be stored in your project file in the WWise directory, so follow this path the find it: This PC>Documents>Wwise Projects>Your project file name>.cache>Windows>SFX. There, you’ll find your song as a WEM file, which you should then click and drag to your desktop.
The next step is to put this file into Pistol Whip’s Steam directory, which can be found by navigating the following: This PC>Local Disk (C:)>Program Files (x86)>Steam>steamapps>Common>Pistol Whip>Pistol Whip_Data>StreamingAssets>Audio>GeneratedSoundBanks>Windows>English(US).
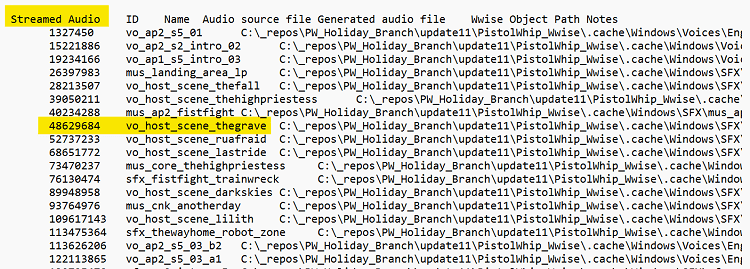
This directory will bring you to all of Pistol Whip’s music files. This next step is a little laborious: with these files representing both sound effects and songs, you need to determine which ones are the songs to replace them. To do this, find the Global file within the folder and open it. Scroll down until you see a heading titled Streaming Audio.
Locate the name of one of the songs you’d like to replace, and write down the number preceding the song title. The official tracklist can be found here if you can’t remember the song names.
Find the song, copy and paste the original into a separate folder somewhere (or on your desktop) so you don’t lose it permanently, and then delete the original. Now, simply place your custom song from your desktop into the English (US) folder, and rename it with the code you wrote down from the original.
You’ll now be able to select your track from Pistol Whip’s tracklist as you would the game’s normal tracks. Of course, you can replace as many of the original tracks with your own music as you like.
Some Helpful Tips
Always ensure you have an original copy of your music: I highly recommend making a folder with all the songs you wish to use in the game, and then copying that entire folder.
Only use one of them for the conversion process; that way, you always have backups of the original WAV files of your custom tracks, and you don’t run the risk of accidentally overwriting those files during the conversion process.
Try to choose songs that match the tempo of the original: Because custom tracks don’t match the tempo of the levels on a mechanical level, it’s best to choose tracks that are at similar tempos to the original game music.
This thread on Reddit is a great compendium of songs that work great with the game’s levels, so check them out if you’re looking for some inspiration!
Frequently Asked Questions
Question: There Seem to be Quite a Few External Steps to this. Is it Legal to Add My Own Music to Pistol Whip?
Answer: While the process of converting songs to different file formats isn’t something officially supported by the developers, it’s still perfectly legal. So long as you actually own the WAV files you’re using to play in-game, you don’t need to worry about anything.
Question: Will any Music Genre Work?
Answer: Yes, you can technically use any genre you like with this method. Of course, not every style of music will work well. EDM, Hip Hop, and Rock/Metal seem to work best with Pistol Whip’s levels.
Question: Is it better to Play Pistol Whip with the Set Music or Your Own?
Answer: It’s better to play the game through with the set playlist than your own music at least once. Ultimately, this is how the game is meant to be played, and you won’t get the full, intended experience if you try to change it.
Conclusion
I hope this article has gotten you up to speed with adding your songs to Pistol Whip. Blasting cyberpunk baddies to the beat of your own music has added so much to an already awesome game, and having followed this simple guide, you too can expand your Pistol Whip experience. Have fun!