

- Best Pokemon VR Games - August 15, 2022
- Beat It!: Best Custom Beat Saber Songs - August 4, 2022
- Best VR Steering Wheels Guide - June 6, 2022
If you’re using an Oculus Quest 2 or an older Oculus Quest, and you stream your games on Twitch, it is natural to want to be able to stay connected with your viewers. On a PC, it’s fairly easy to see your Twitch chat when playing games as a small pop-up window. On a VR headset, however, there’s no straightforward way to do this, and there are a few workarounds that you need to get through to learn how to see Twitch Chat on the Quest 2. While I personally do not stream games, I’ve helped my peers set up their twitch streaming via their VR headsets, and it’s not too difficult to put the components in place to be able to see your twitch chat on the headset as you play the game.
Bottom Line Up Front
You’ll ideally need your PC to stream your Oculus Quest 2 to Twitch. It’s a suggested requirement for this article. You don’t have to have an Oculus Link Cable, but I’d say it’s advisable. The whole point is to be able to comfortably have your game running on your PC as well, to then be able to connect your PC to Twitch and stream from there.
You’ll first need to be able to connect your headset to your PC in order to be able to stream to Twitch. Once you’re through that hurdle, you can then proceed to put in place the workarounds that will let you see your Twitch Chat while you are in-game.
You’ll also need OBS Studio to be able to stream your game on to Twitch. Any users that use Twitch for streaming from the PC know this is a necessary requirement and a fairly easy application to use that makes the streaming experience more convenient.
How to Stream to Twitch from Your Oculus Quest 2
Naturally, with Facebook’s acquisition of the Oculus brand as well as its rebranding as Meta, focusing on life in the Metaverse, it’s only natural that the VR space gets more interactive, as well as making it easier to connect to the other users in the space.
With the growth of the VR gaming ecosystem, including, but not limited to, the expansion of VR titles and the entry of popular developers into the VR space, users are getting more and more into streaming and watching players use VR headsets to play the many different titles available. If you’re like me, you’ll want to try streaming as well at some point, just to see what the experience is like.
There are ways to stream from your headset to Twitch directly, as well as while wired to a PC. It’s advisable to use the wired method for the most seamless streaming experience, but if you’re confident in your broadband’s capabilities, then you can definitely go for it.
The Wireless Method
To set up a wireless link, you need to ensure that your Oculus Quest 2 headset is connected to the same WiFi network as your PC. It’s also completely fine if your PC is connected via a LAN cable, so long as the WiFi that your headset is connected to stems from the same network.
Once you’ve seen to it that you’re on the same network, you can press the Oculus button to open up the menu on your headset. Under the Sharing tab, you will see the option to Cast your Oculus Headset. When you enable this option, you’ll see options to cast to your phone app or to your Computer. Select the option for your Computer.
The menu will then create a casting link for you, which you can then open on your PC through its browser while connected to the same network as your headset. When you open the link, you’ll need to log into the Facebook account that you use on your Oculus Quest 2 headset.
Once you’re through this step, you can open up OBS and select the source as window capture and select the browser where you used the casting link from the Oculus Quest 2. You can then set up this window and other screens as you normally do on Twitch and get to streaming.
The Wired Method
You’ll need to have SideQuest installed on your PC for this method to work, as well as an Oculus Link Cable for the best experience. It’s okay if you don’t have the Oculus Link Cable, and you can use one of the alternatives, such as the Anker Powerline Cable.
You’ll need to become an Oculus Quest developer for this part. It’s not a long process. You can head over to developer.oculus.com and log in using the Facebook account that you use for the headset. Click on My Apps and create an organization name, and make sure it’s not copied from anywhere. You can then download the ADB Drivers for Oculus. When you open the driver files, you’ll see a file titled “android_windusb.inf”. Install this file particularly. Then, you can open the Oculus app on your mobile and open the Devices tab from the menu.
Then, you can head over to Developer Mode and turn it on and restart your headset.
Once you’re through the developer setup, you can connect your Oculus Quest 2 to your PC via a USB cable, although I’d suggest the Link Cable or a Link Cable alternative to ensure the best transfer speeds and a more streamlined experience.
Once you’re connected to the SideQuest app, you can then select the Cast option on the top bar of the SideQuest app. If you need, you can alter crop and resolution settings to be identical to your PC display so as to ensure that the video output is as smooth as possible.
From here, you can follow the same steps as in the above method, and then open OBS to add a source, add a display capture and then stream on Twitch.
You can also do this wirelessly by hitting the WiFi button on the same top bar on SideQuest and then connecting to your headset. Once that’s done, you can remove the cable and follow the same steps to stream through OBS. However, I’d suggest using the cable since there’s a lot less delay, and you cannot always trust the fidelity of a WiFi connection for streams, in my opinion.
See your Twitch Chat in Oculus Quest 2
There’s more than one way or reason that you may want to look at your chat on the Oculus Quest 2. The first part of this is going to deal with looking a the twitch chat independently through the use of a browser window. You can have this browser window open anytime.
However, to use the twitch chat overlay in the game, you’re going to need a more complicated solution. The second part will discuss how to see your live Twitch Chat as your gaming. Even within this, there’s more than one application that you can use to see your live Twitch Chat on your headset. Some of these are free, while others are not, and depending on your target audience, your desired experience, as well as your budget, you can set up whichever one you think will suit your goals best.
Using OVR
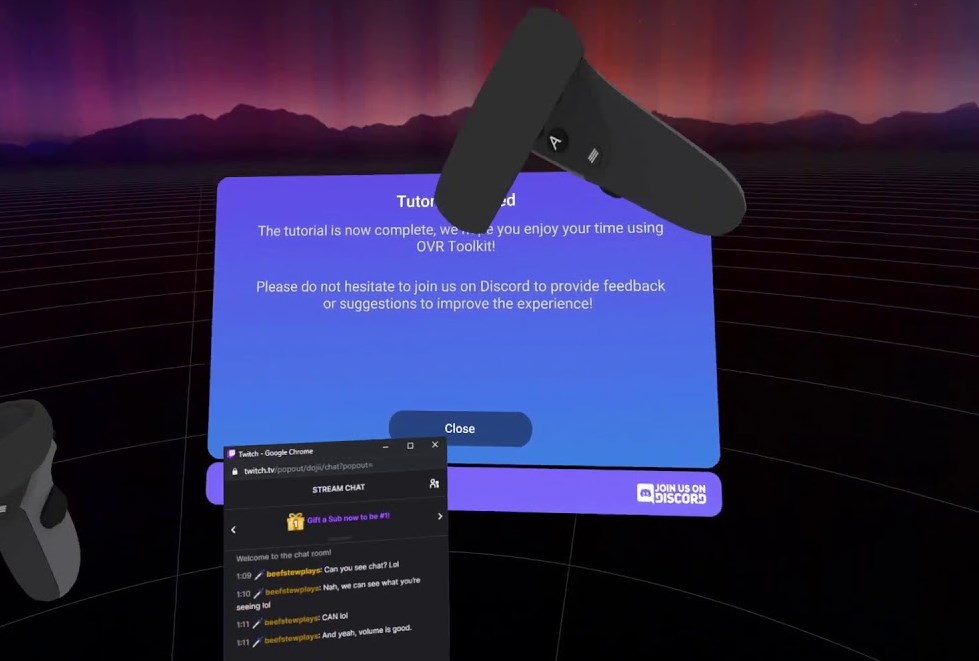
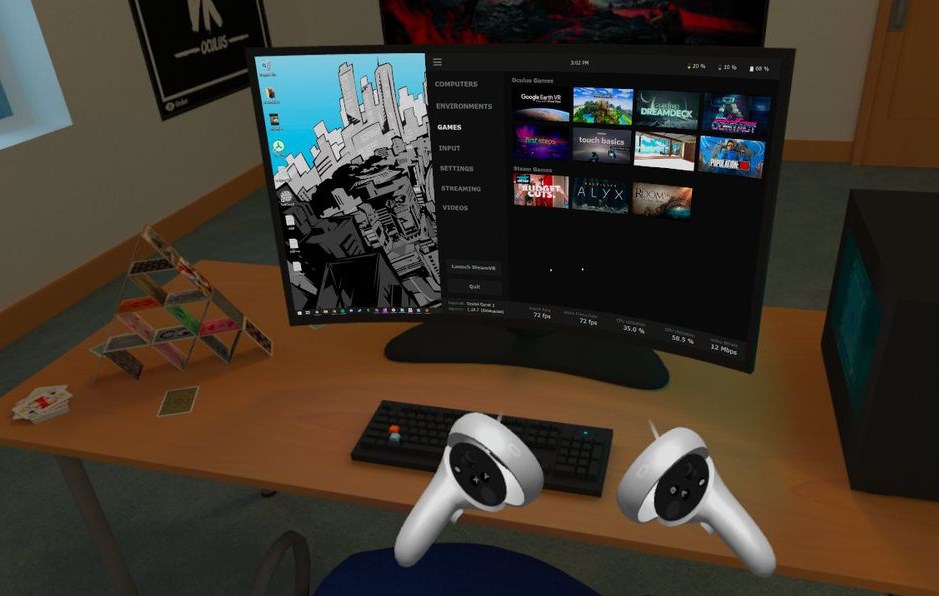
You can use the OVR (OpenVR) Toolkit app for streaming to get the Twitch chat in your VR headset. It’s available on Steam. OVR is a paid application. There’s a free variant available here, but it will only enable streams up to 360p, and that’s not advisable, in my opinion.
You can then Open Steam and launch the OVR app along with the SteamVR app. Once you’ve logged into Twitch from the OVR app, you can connect to your headset.
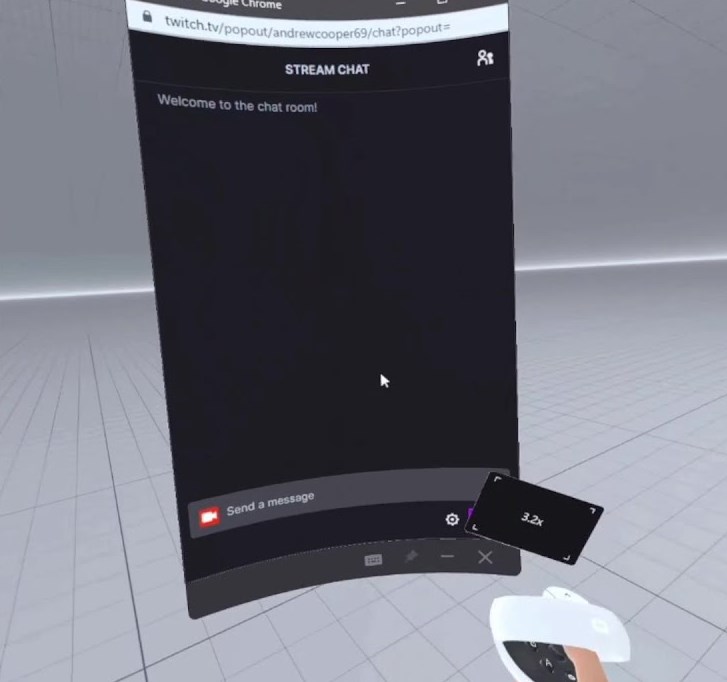
Then, you proceed to your browser, log into Twitch and then hit the chat option and switch to non-mod settings; from there, Pop-out the Chat in a separate browser window.
In the World option on the OVR menu, you can select the right-hand controller to be used to bring up the chat in VR. From here, change the drop-down menu to None and set the opacity, etc., as per your preference.
From here, the only thing missing is to add your chat window (the browser) to the broadcasting software (in our case, it’s OBS). You can then test the feature by going live and bringing up your Twitch chat using the controller you selected.
Using Air Link
Alternatively, you can always skip the paid application and use the Oculus Air Link to create a pinned window and then always have your Twitch chat always hovering in a specific spot in your game.
The Air Link can be enabled through the headset itself. Open Settings through the Quick Settings panel and scroll down to Experimental. Here you’ll see a toggle for the Oculus Air Link, and you can enable it from here.
Now, you will agree to the requirements and hit Continue before you see an Air Link option in Quick Settings. You can pair it with your computer from here after you select it from the Available PCs and confirm the pairing code shown on both the devices. You’ll need to confirm it from the Oculus Desktop app as well, and then you can Launch the Air Link to begin.
To set up the chat now, connect your Oculus Quest 2 headset to your PC through Oculus Air Link. Make sure you have your PC running the pop-out chat window in the foreground of the browser where it was opened. This will ensure that the window stays updated and keeps showing live chat as it happens.
Next, you will add a desktop panel to the Oculus Air Link, and then you can select the Twitch chat window. From here, you’ll see that the chat window has appeared as a flat banner in your VR space. You can drag it around, place it, spin it, scale it and distance it to your preference. Once you’re sure where you want the window, just make sure that you have your positioning finalized since you can’t change the positioning once you boot up a game from the Steam library.
Once that’s done, you can pin the chatbox to the specific position in the VR space and boot up the game. I’d suggest putting it somewhere above and behind you, where it doesn’t interfere with your game, but you can always see it at a glance. After you’ve booted the game, you can play your heart out and see the chat as and when you wish. However, if you want to move it again, you’ll have to enter the Air Link space again to be able to unpin and re-pan the chatbox.
Using Oculus Link Cable

You can also use the Oculus Link cable and be launched into a similar menu as the Air Link, from where you can then add a desktop window and continue on the steps from the previous section. This is a much better option since it will make your headset’s battery last longer, as well as make sure that you have a seamless performance where the visual aspects of the VR space are concerned, since the Air Link depends on WiFi, and that’s erratic in most cases for such heavy streaming requirements.
Frequently Asked Questions
Question: Is Twitch Streaming Built Into the Oculus Quest 2 Headset?
Answer: No. You can’t directly stream from the Oculus Quest 2 headset and will need another application like SideQuest, Virtual Desktop, or an Oculus Link to put the streams on your PC. Even after this, you’ll need some stream management application on the PC end, such as OBS Studio, to ensure that the stream from the right source gets put on Twitch.
Question: Do I Need to Pay to Have a Chat Overlay While Gaming in VR?
Answer: No. You don’t need to make any payments for the feature. You can use the free version of OVR as well as the Oculus Air Link/Link Cable method. Both of these are free, and you will not need to make any payments to opt for these methods. Personally, I’d suggest the Oculus Link method since the OVR free version will have you capped at 360p streams.
Question: Do I Need Additional Software on my PC to see the Twitch Chat While Streaming?
Answer: Yes. You’ll need additional software such as OVR (if you opt for it) as well as OBS Studio to manage your streams and windows while on Twitch. You’ll also need the Oculus PC app if you’re opting for any of these options, as well as the Oculus Air Link since that app will make your life much easier when concerned with PC connection.
Conclusion
There are multiple ways to stream your VR content to your PC and then to Twitch from your PC. You can use SideQuest or directly cast from your headset to your PC via a casting link created from the Oculus Quest menu. Alternatively, you can connect through Oculus Link and then try casting, depending on where the experience is better for you.
From here, you can select how you want the chat window to show up in your VR space. You can use OVR to put it on top of games, with more customisability with settings such as opacity as well as movement.
Alternatively, you can use either type of Oculus Link to pin the chat pop-up window as a desktop window in your VR space and then continue to game. The downside here is that the opacity is 100%, and you can’t move the window around while in the game and will need to go back to the Oculus Dash to change this.
Once your casting and chat window is sorted out, you can finally connect to OBS and select the streaming window to be sent to your Twitch channel. Hope this article helped you with your streaming ambitions! That’s all, folks!
Continue reading: