

- Half Life Alyx Character Guide: The Only Character Guide You’ll Need - May 24, 2022
- Painting VR Review: The Mad Science of Painting - May 20, 2022
- Cities VR Review - May 10, 2022
In Death: Unchained is an archery game for the Quest Headset that tasks you with fighting back the armies of the Fallen in a war between Asmodeus, his allies, and the Creator. As my absolute favorite way to flex a digital bowstring, allow me to be the proverbial Virgil to your quest to take down Knights, Archers, Demons, and corrupt Angels and guide you through Heaven, Purgatory, and the Abyss.
Combat Movement
In this game, everything amounts to your bow. You live through the bow, breath through the bow, most importantly, you literally move using the bow. Holding down the a button—or x should you be playing on left-handed mode—will spawn your movement arrow. Initially, this arrow does minimal damage compared to your normal arrow, but as you unlock specific achievements this will improve. With continuous movement on you are able to roam slowly by freely with your bow hand while in both options the off-hand thumbstick will rotate you.
Dodging and Blocking
Holding the grip button with your offhand will activate the movement shard, toss it for short but quick teleportation to the side allowing you to dodge a surprising blow. Meanwhile holding the grip button with your bow hand will summon the shield, allowing you to block. Once you unlock the crossbow you will find these options are reversed, giving the added benefit of being able to block while aiming and firing your crossbow. You will still need to leave yourself open in order to reload your crossbow, don’t be afraid though.
Archery
This game is built off of its archery mechanics and it shows. You are given leeway as you do not have to reach for your quiver. Place your hand to the bowstring, press the trigger button, and pull back. Simple in practice but takes experience to master.
Firing a bow is a whole different beast from aiming down iron sights, it does share the qualification of needing a strong stance. A strong, consistent stance is crucial to consistent shooting. We’ll start from the ground up. Your feet should be pointed how you feel most comfortable, this is not as important as the rule-of-thumb to keep them generally shoulder width. It is also crucial to keep your knees bent, only slightly though. The point is not to let your legs lock, causing trembles to course through your muscles as you tense to let the bow go.
Keep your back straight, bending at the hips rather than the lower back. Your shoulders need to be straight and your bow hand should be parallel to the ground. All of this will center you, much like meditation. Exactly like meditation when you get your mind used to this process. All of this will help you visualize your target and always meet your mark so long as you follow this last most crucial step. Remember your anchor point.
The anchor point might vary based on your comfort, but essentially, this means every time you knock that arrow back your off-hand will always meet the same spot. For me it is the area directly between the corner of my mouth and my chin. This is important as where you hold your off hand compared to your bow hand will affect how your arrow flies. Once you get used to where your arrow lands once released from a consistent anchor point, it simply takes practice to become a crack-shot like hawk-eye.
Achievements
There are 138 achievements to unlock in the main mode and 72 achievements in Siege of Heaven. Each achievement either unlocks upgrades to your character or adds enemies and levels.
As the game is going to grow harder as you progress, it is wise to attempt the achievement where you beat Purgatory without taking damage as soon as you can for risk of making it incrementally harder as you progress. The reward for this task is a permanent extra health-bar so it is well-worth your efforts.
The Crossbow
Killing 101 enemies will unlock the ability to switch between the bow and the crossbow.
The crossbow is loaded by notching the bolt and then pulling the trigger, allowing you to ready bolts for future use. All trick arrows will work as expected, but the Shield and Teleport Shard buttons (your grip buttons) will be switched.
The Crossbow is not available in Siege of Heaven.
Trick Arrows
These arrows are the same across the bow and crossbow. Trick arrows are most commonly found as a random drop from enemies or in the small randomized shop found on the first two bridges in an area.
Once you obtain a trick arrow you can either hold down either of the face buttons on your bow hand to show you quiver or quickly tap the face buttons while your arrow is drawn to cycle through your currently equipped trick arrows. You initially only start with two slots to hold trick arrows along side the average arrow, but as you progress and complete achievements the number of arrows you can hold will increase.
You will initially start with a select few trick arrows but as you unlock achievements you will gain more to discover in your runs.
Barrage of Needles: Unlocked from start
Ricocheting Needles: Kill 266 Abominations.
Wildfire: Unlocked from the start
Hellfire: Exterminate 3666 abominations
Winters Bite: Unlocked from Start
Winters Bite 3: Murder 66 cupids
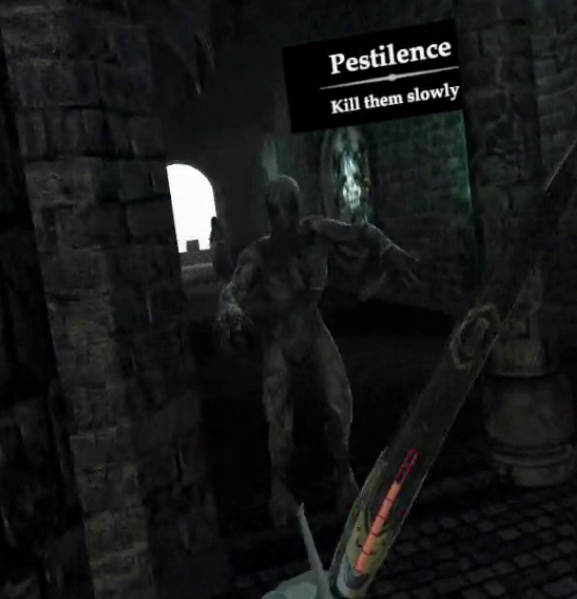
Pestilence: Kill a frozen enemy with fire.
Incursion: Banish 181 ghosts
Cataclysm: Slaughter 21 monks
Cataclysm 3: Slaughter 3101 monks
Ricocheting Cataclysm: Slay 39 Temple Knights
Ball of Lightning: Slay 149 Temple Knights
Ball of Lightning 3: Kill 266 cupid
Hail of Arrows: Slay 579 Temple Knights
Volley 3: Score 66,666 points
Cupids Wrath: Kill 2 Incubi
Tempest: Defeat Anakim the Abominable
Holy Light: Defeat Gabriel the Fallen
Grace of God: Kill 66 Screamers
Divine Sight: Knock a cupid out of the sky with your shield.
Divine Sight 3: Headshot 266 Bats
Azure Fury: Execute 9 Banshees
Amulets
Dying 5 times unlocks the ability to find the amulets.
These amulets are then found merely by killing enemies. These six amulets are
Resistance Privilege: Grants a single holy armor which shields you from a single hit.
Unusual Fortitude: Grants an additional health. Unlike Resistance Privilege, this health bar can be healed by Blood of Lamb.
Wealth Privilege: Grants and Addition 1500 gold per run
Blessed Quiver: One Special Arrow Slot has its capacity increased by 33%
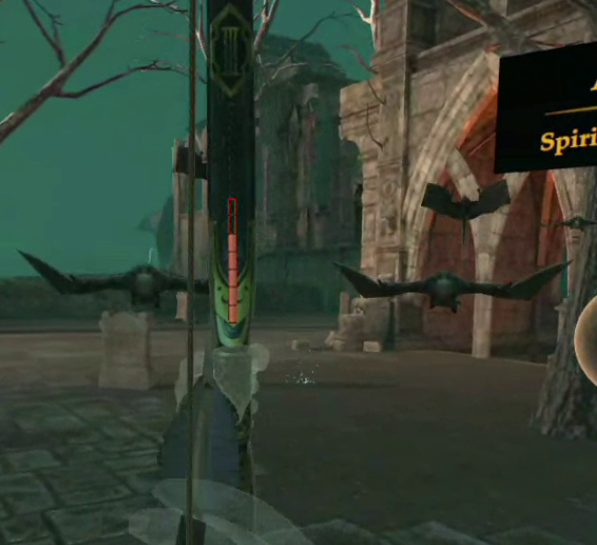
Spiritual Assistance: Increases Bow-String Pull Strength when string isn’t fully pulled.
Anakim’s Flaw: Lowers Anakim’s base health.
Misc Upgrade Unlocks
Extra Arrow Slots: Slaughtering 71 monks and 901 monks both unlock an added arrow slot.
Holy Armor: Die 66 times
Titan: Execute 29 Banshees
Main Mode – Rogue-lite
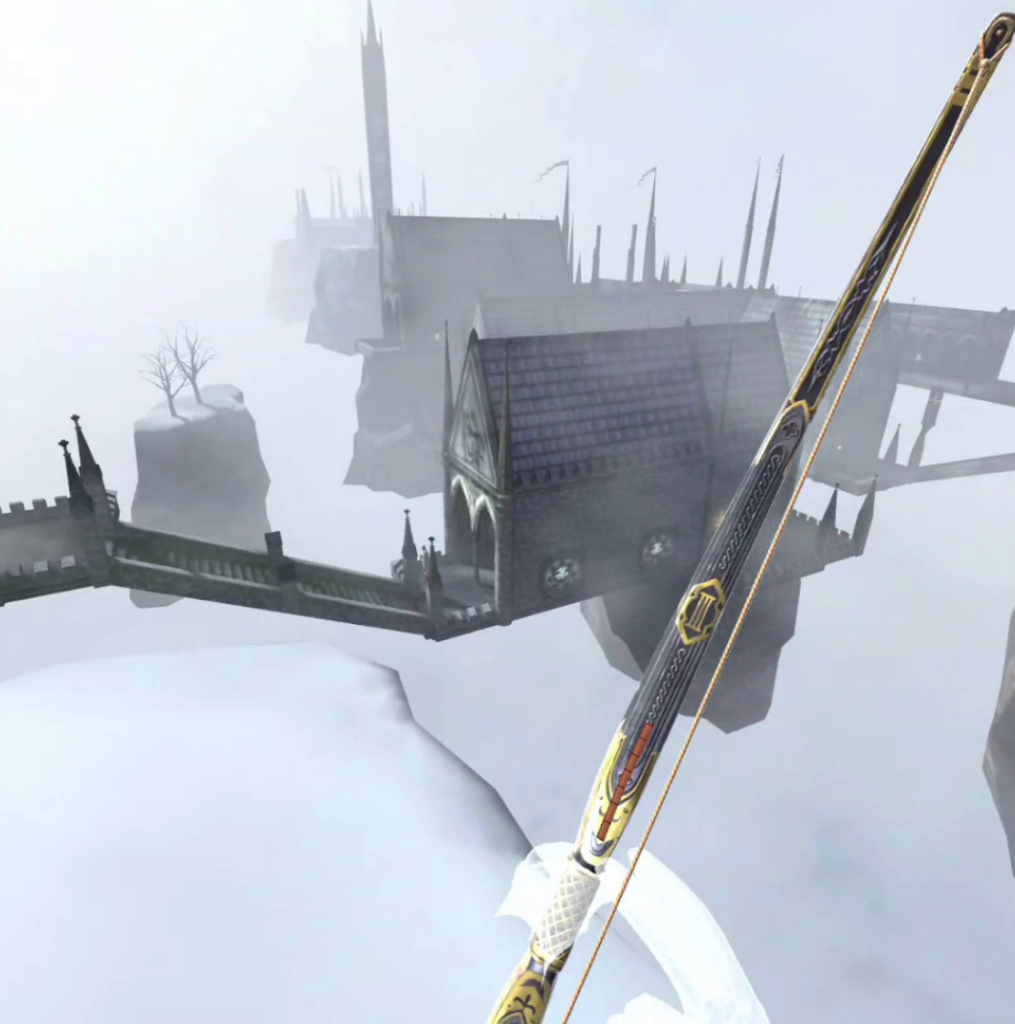
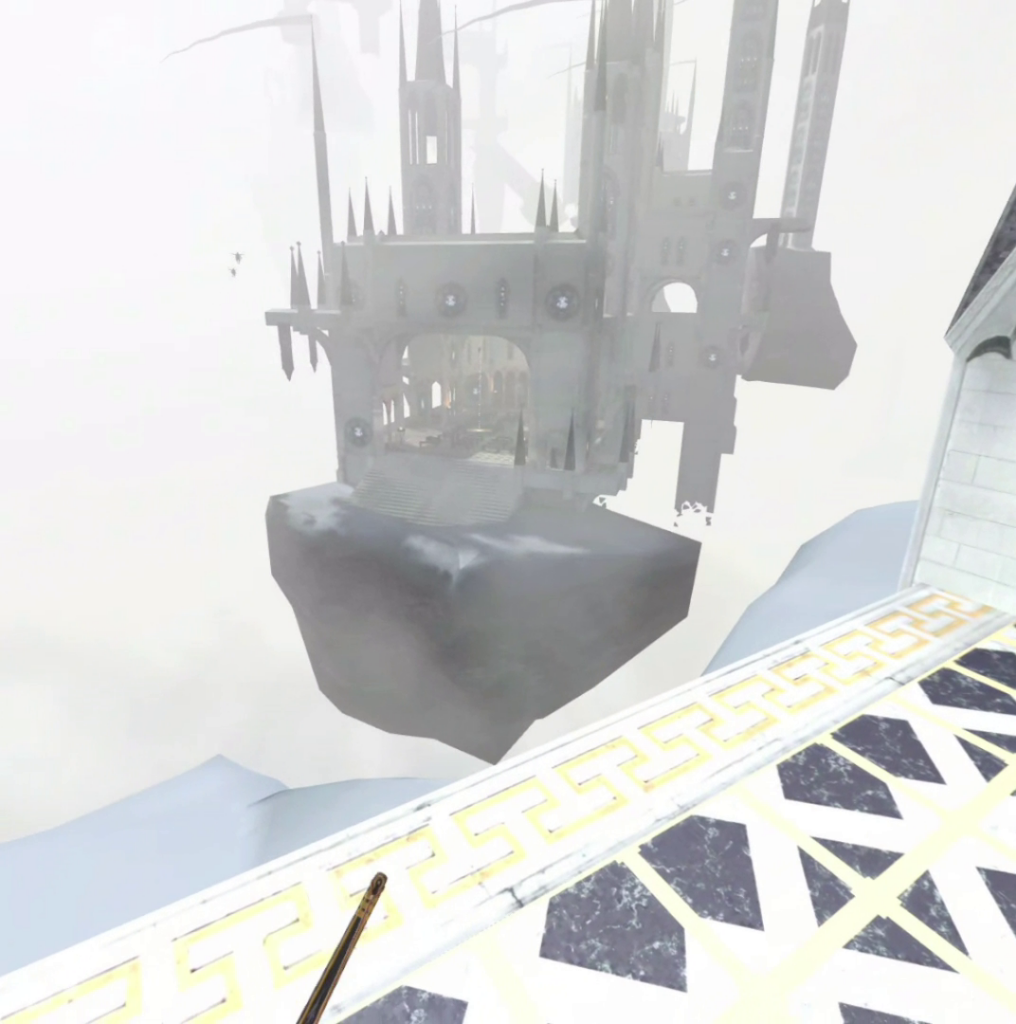
Each map consists of three islands separated by long bridged pathways along with a final island that will lead you to the boss of that level.
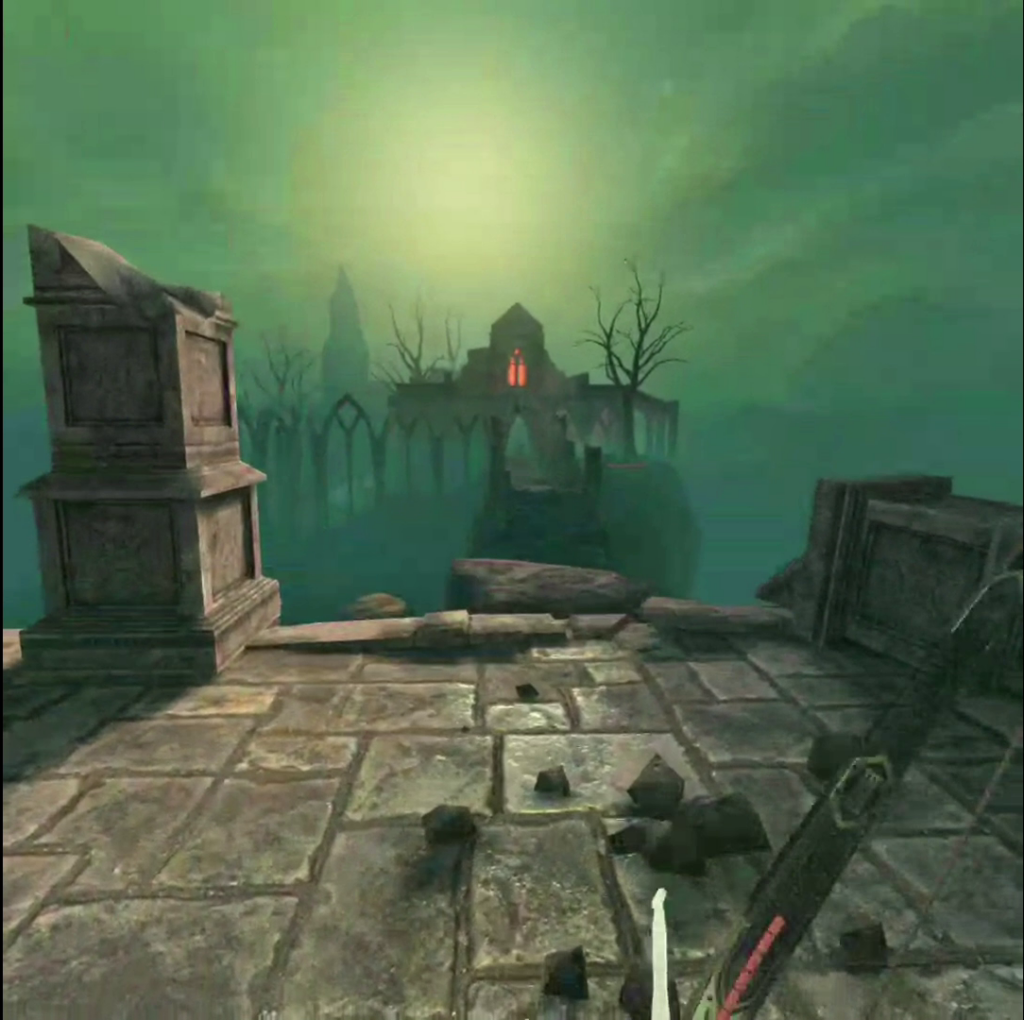
The first two bridges connecting these islands have a notable disconnected church tower with a beam of white lite which, when you shoot a teleportation arrow at it, will send you to a space called the Reliquary. Here you will be able to spend the gold you have accumulated through each run via mowing down these hooligans who have taken to barging through the heavens. Keeping with the Rogue-lite tradition, gold you acquire will not be kept after death.
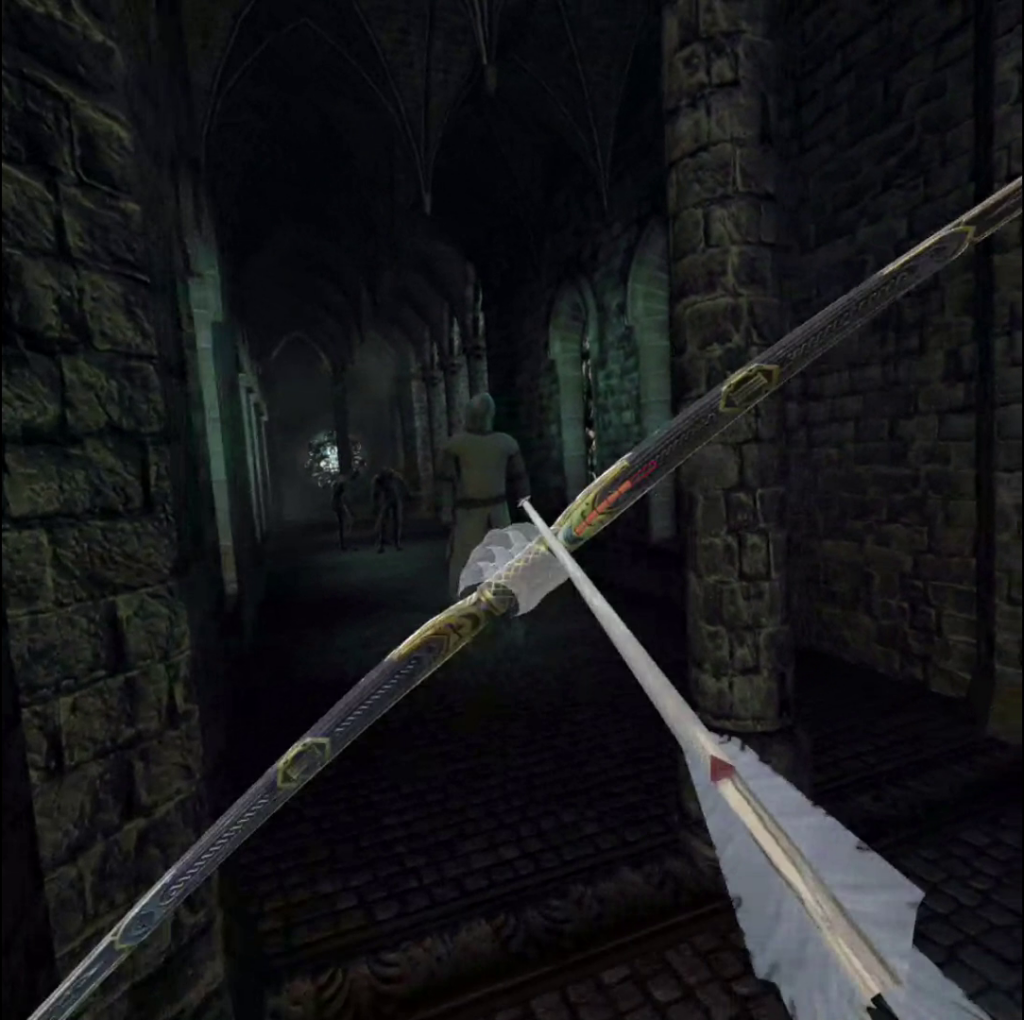
Purgatory
Purgatory will be the first map you go through. This will become your home for a bit so keep comfortable. Fitting its name this realm looks more Earth and grounded than the rest. Churches on islands piercing the clouds will be your arena of choice, with Anakim waiting for you at the end.
Abominations
Gaunt ghouls with no facial features and skin like a dried husk, are the easiest enemy you will face. Their danger lies in their tendency to hang out in large groups and crowd around the tougher targets. A lone arrow aimed anywhere will take these guys out.
Monks
At their first level they wear brown robes and do not offer too much of a challenge as long as you keep track of them, especially as they will teleport in order to get a better bead on you. They are usually taken out easily with two shots to that black void within their hoods or three shots to their body. As you progress in the game and unlock achievements, more hearty Monks will appear with a higher rate of fire.
Templar Knights
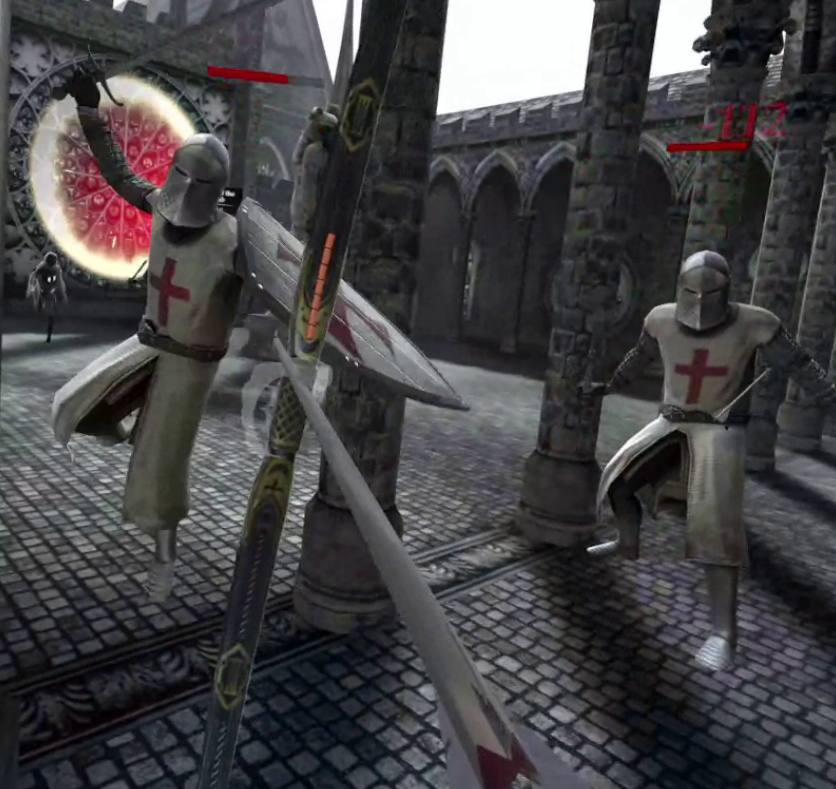
Clad in armor that is sure to ignite the Assassin pride ubisoft has instilled in multiple generations of gamer, the knights serve as the thought fodder-enemy in Purgatory. They start simple enough, rushing at you with a sword and only resorting to throwing axes should you cheekily put yourself out of their reach, as you progress they will start getting tougher. First by introducing ones that carry a shield but have the same amount of health, then slowly progressing to include more powerful versions of the Templar.
Ghosts
A truly obnoxious enemy, you will only have to worry about these tests of your aim around portals to the Pits of Retribution when it comes to Purgatory. Three will linger outside of the portal and, upon being agro’d, will glide through enemy and stone alike to reach you. They will only go down with a well placed shot to the glowing wisp in their chest.
BOSS: Anakim
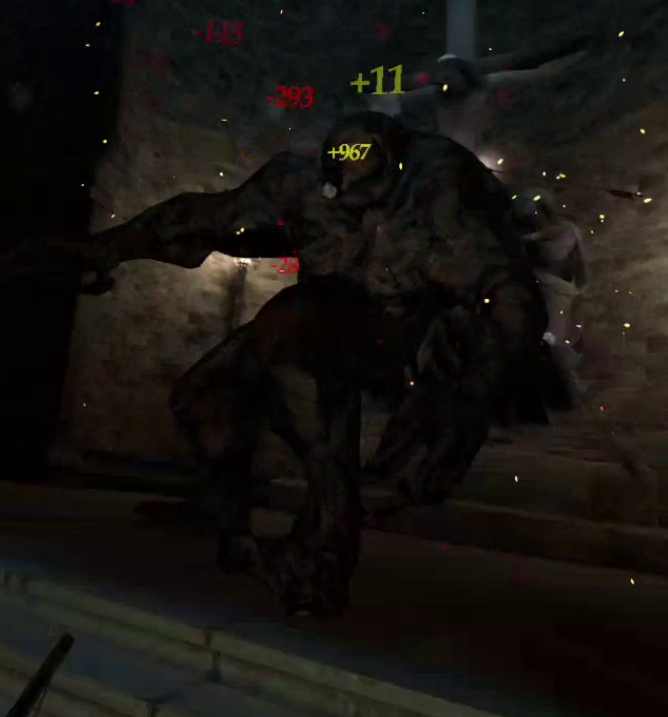
The boss of Purgatory, Anakim can prove to be quite a headache if you don’t know how to approach him. Alone he is a lumbering behemoth, what makes this fight dangerous are the numerous white-robed monks who are going to spawn in the alcoves lining the walls of the boss arena. To further complicate matters, he will summon Abominations at random to rush you. There are two major plans of attack here.
The first is the typical tactic of playing a game of patience and perception. Teleport around the arena taking down Monk and Abomination alike while peppering Anakim’s head with arrows.
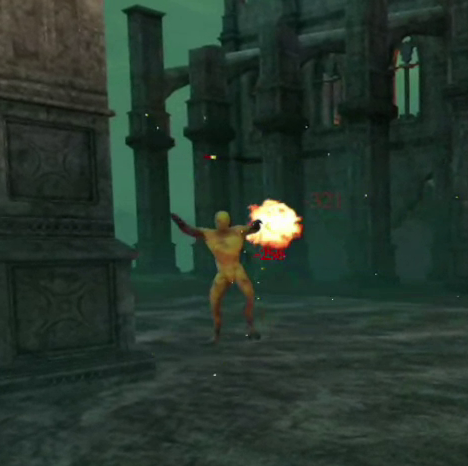
The quick and dirty method is the simplest. Aim to get Cataclysm, not Ricocheting Cataclysm, in your arrow slots. Now either save those arrows or hope to find a quiver along the way. Once you reach anakim, devote the entirety of the battle to pretending your arm is a machine and your bow is an automatic weapon. Just keep firing your glorious explosive arrows in his face until he falls. Other trick arrows can be used to varying success, but with how often Cataclysm drops and how powerful these arrows are it is likely your best bet with Cupid’s Wrath a close runner up.
Desolation
Desolation is unlocked by finding a particular stray bat in Purgatory. Merely take the bat down and you have access to Desolation from the main menu.
This map feels the closest to Earth. It is a desolate and destroyed Earth, but rather that cloudy infinity the depths are dark like a deep ravine. The islands are all perched on cliff faces with ancient crumbling ruins botting them.
Here you will once more run into the Abominations, Templars, and Monks you are familiar with, only a couple new additions join this depressing party.
Bats
Like the Abominations these can be taken down in one shot, their danger lies in their spawning in numbers and soaring down from the sky. Once they have a bead on you they will all fly in a beeline towards you until their path finding resets, dodge to the side of their path and mow them down at your leisure.
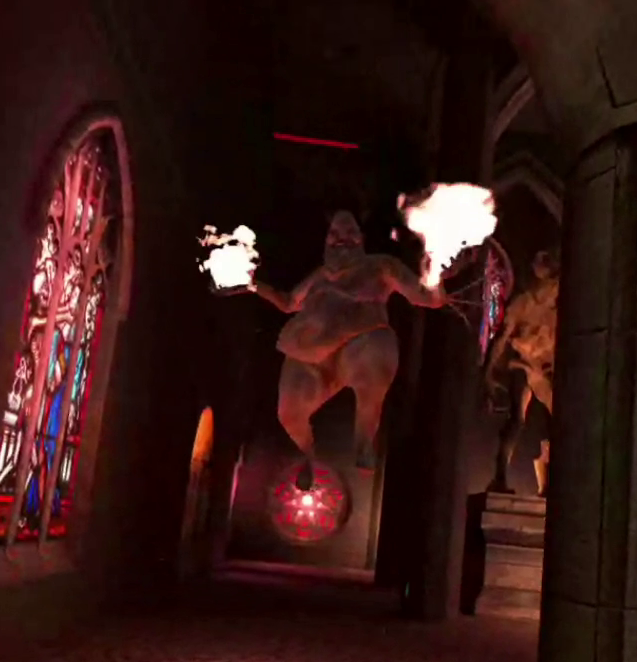
Screamers, the Alpha Abomination
It looks a lot like the abominations but it is bigger, faster, absolutely determined to give you the most brutal hug imaginable, and is so horrendously yellow you will see it before you hear its haunting scream. This is another health-sponge so make sure to teleport around, take care of the add-ons, then strike this menace down.
Summoners
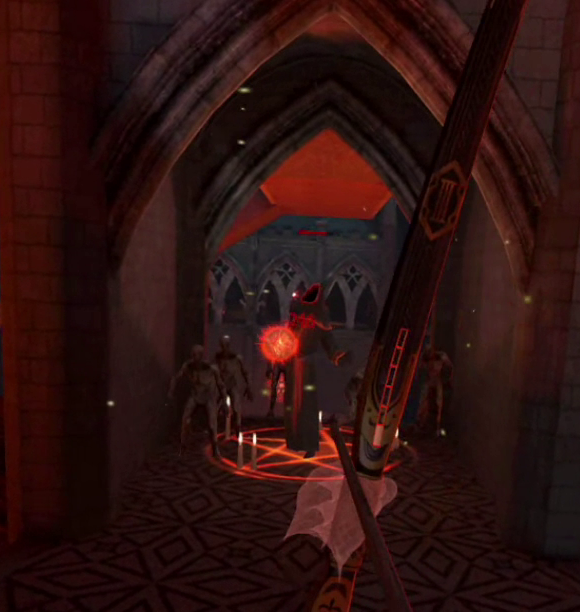
As you travel Desolation you might teleport yourself into an ominous glowing circle. This is the sigil of the totem. Summoning Abominations to make your day ever harder, these magic users are easier to find than you might expect. Often hidden in a tomb located on one of Desolation’s islands, you can easily locate these summoners from the blood red trail streaking from the summoning circle straight to the pentagram circle they are working their magic from. Once you locate the hooligan, give him the headache he proved to be for us all.
BOSS: Anakim, Again
Once you reach the end of Desolation you face Anakim once more, only with some more powerful Monks at his side. Just like in your first battle with him, the wisest strategy is to conserve Catalyst arrows for this encounter. Should you lack them, teleport around the map, clear away the fodder, and aim for the head.
The Pits
The Pits of Reformation are unlocked after you buy your first item in the Reliquary. While not accessible from the starting menu, a fiery red portal will appear in Purgatory and, rarely, Desolation. This portal is guarded by three ghosts, but you can avoid confrontation by firing a teleportation arrow directly in the portal. This will send you to a cramped set of dungeons full of tightly packed enemies.
The pits are completely optional, with 5 ‘levels’ in all. A pit is beaten by clearing enough enemies in them, causing a portal to appear which will bring you back to the map you came from. After beating the Pits of Reformation, the Pits of Perdition are unlocked. Upon beating that, the Pit of Immolation is unlocked. The next two are only accessible in the Abyss. The pit of Agony immediately unlocked, while the Pit of Despair is unlocked upon beating it.
In the pits our only returning guests are the Abominations and Templars, but we have plenty of new issues to worry about in the dungeon-styled catacombs of the Pits.
Ghosts
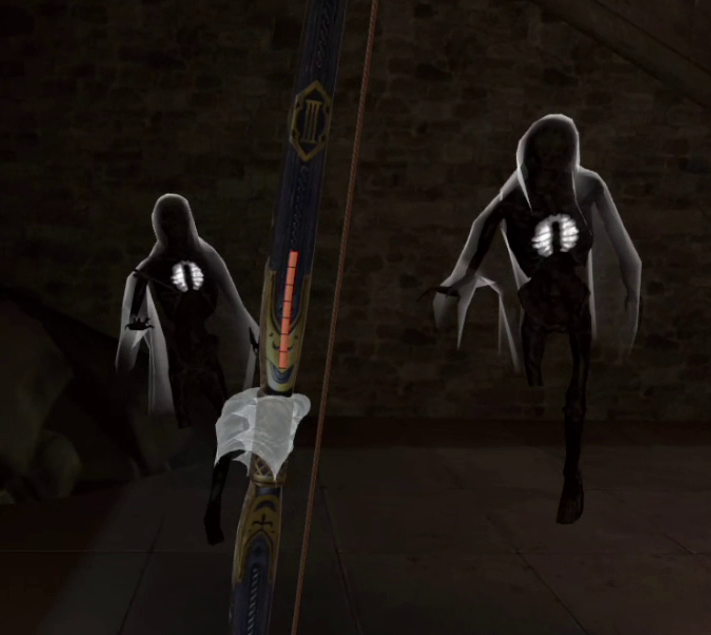
While I touched on them in purgatory, Ghosts take on a new threat in the Pits. Now scattered across the map, the ghosts will become alerted to your presence the moment an arrow flies past them to crack the wall near them. While they can be very briefly stunned with a strike anywhere, the only way to banish them is either to be struck by them or, the advised option, shooting them in the glowing symbol of an eye on their chest.
Ghosts can glide and attack through walls. This is a very startling and dangerous ability.
Skeletons
Next to Ghosts, the Skeletons should be your highest priority. Preferably based on which is closer. The skeleton fights like a sped up Templar with a shield, with the added horror of them being able to teleport and not afraid to use it to appear behind you. Keep your ears open for the sound of them teleporting behind you and aim for the head.
To replace our favorite Monks there are also Skeleton archers. They not only fire quicker, but killing them immediately spawns an abomination for you to kill.
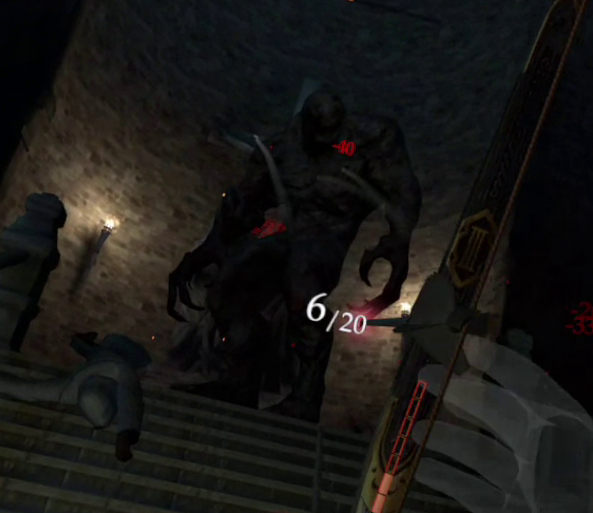
Incubi
Looking more like a massive, rotund imp the Incubi have a hefty amount of health. The pits generally have 2 to 4 of these behemoths around and the moment they see you they will start flinging fireballs with a deep laugh. They are also capable of teleporting but are not as quick to use it as the skeletons.
A strike to their forehead will have them stumbling just enough to be able to trim the fodder around them then take them down.
Paradise Lost
Paradise Lost can be reached in two ways. The first is by beating Anakim and continuing through the portal. After beating Anakim 6 times, you are able to start in Paradise Lost from the main menu.
This map is more reminiscent of heaven with the pudgy cupids flying around among buildings of marble and gold stretching along floating islands which stretch intricately along bright white skies. This map is going to test your aim with the teleport arrow, as many of its nooks and cranes take an eagle eye to hop up to, with the bridge of islands often the easiest to access from the top.
You will find our old friends the templars here with a rare appearance from the monks, but two newcomers take center stage in Heaven.
Cupid
They are tiny, they are mildly hard to hit, and they will shoot two arrows at once from a far distance. Like everything else seems to at this point, it will teleport if it can’t get a good bead on you. You’ll have to be particularly quick to locate and launch an arrow or dodge as the Cupids like to teleport with their bows notched. Luckily they have very low health, taking a single shot or even a smack across the face with a shield.
Banshee
These enemies look like ghostly women in black dresses of mourning. They wield a staff that allows them to cast slow-moving projectiles that are capable of gentle turns to follow you and are mildly difficult to see against the white of Paradise Lost’s sky.
They don’t take too many shots and their long casting time gives you ample time to crack them with an arrow, disrupting their casting and allowing you to fire off a few more and handle the cupids narrowing in on you.
BOSS: Gabriel
The corrupted Angel Gabriel seems intimidating but compared to Anakim the Meat Sponge he is a push over. He attacks fast and hard, but spamming whatever you managed to pick up on your way to meet him should be all you need to obliterate him.
Gabriel will first appear where a beam of light touches down. Avoid hanging in that area as he will come down with a ground pound. After this, he will fly around the ring and rush you with a swing of his sword. He will periodically spam fireballs requiring you to quickly teleport or dodge around the map and, on rare occasions, he will spawn additional enemies.
Abyss
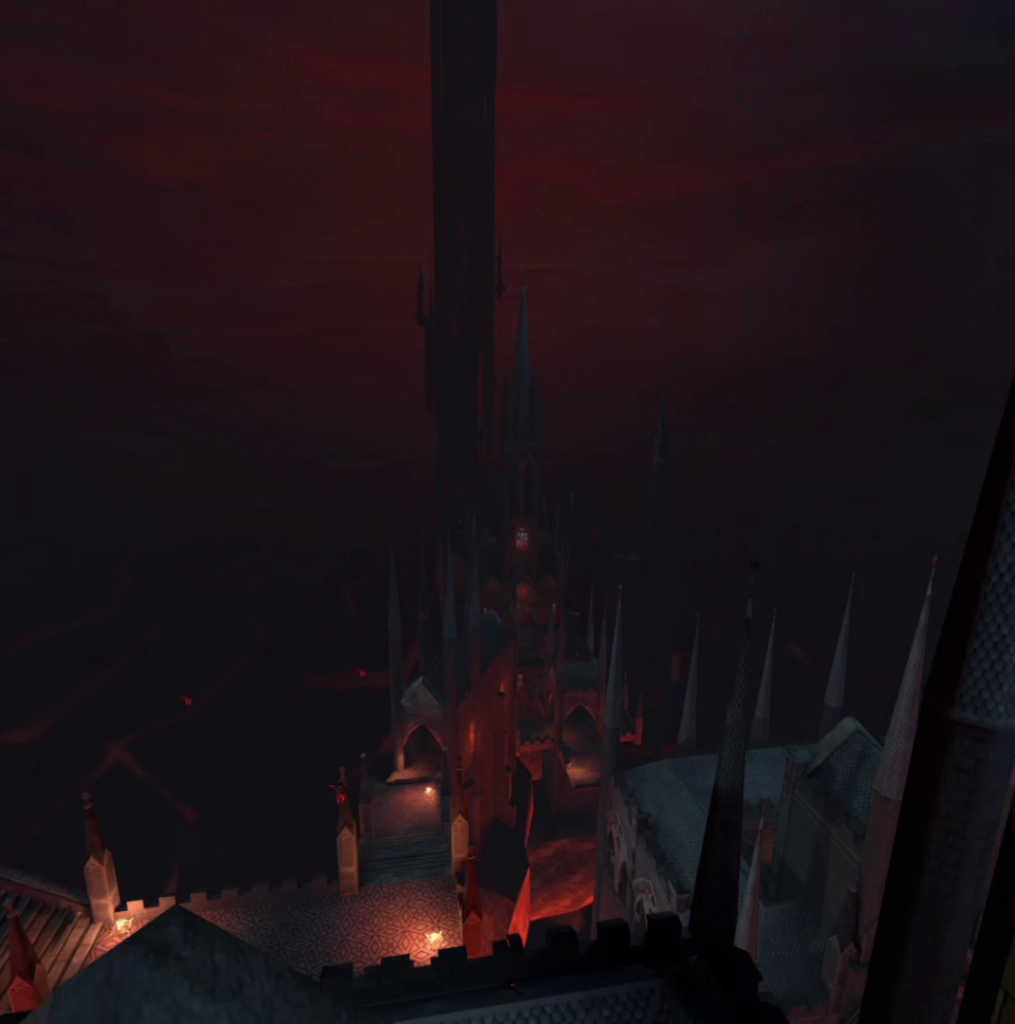
The last of the maps you will unlock, this is the home of the game’s most powerful enemy. The final boss Asmodeus. This final test of everything you have learned up to this point is fittingly only accessible from the menu upon unlocking 48 of the 138 achievements available to the Main Mode. Please note, achievements unlocked in the Siege of Heaven mode will not count towards this total. Otherwise the Abyss can be accessed through a portal directly behind Gabriel’s boss room after defeating him.
The Abyss is a hellish Labyrinth full of every creature you have faced until now. The only new inclusion is
Flaming Skull
Slow but explosive. Hitting them will cause a short range explosion so take care not to hit them when they are too close.
Siege of Heaven – Gate Defense
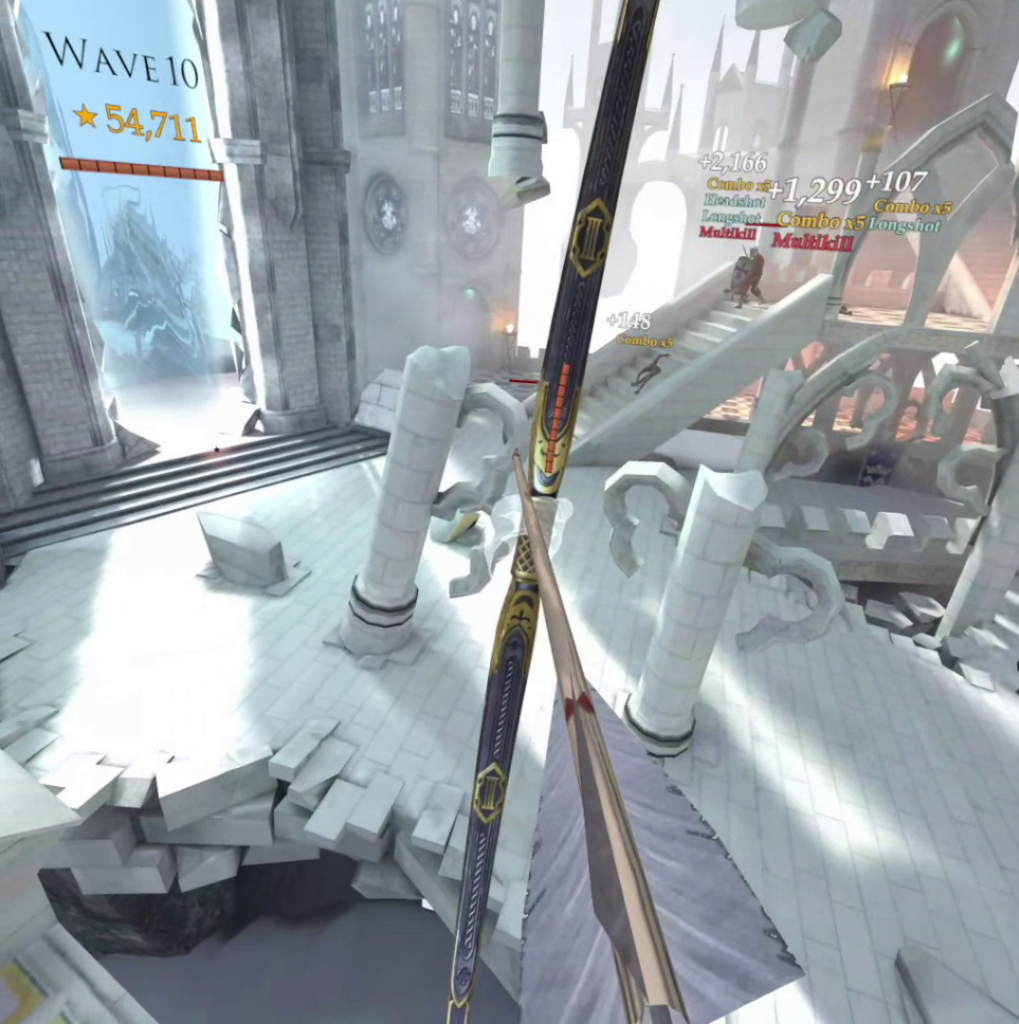
One of the main features missing from the PC version of the game, and further incentive to get the headset version, Siege of Heaven is a recent and periodically updated mode that acts as a wave shooter. The mode has its own separate achievements, 72 to be exact, which have the same benefit of the Main Mode achievements in which every one unlocked improves your character. This can show itself in more starting gold, higher gate health, more treasures to unlock between rounds, and more marvelous surprises.
Each game starts you off on a platform that you can not move from, a stark contrast to the main mode’s rogue-lite setting. You have 15 waves you have to fight through, each round started with an oddly empowering shot to a massive bell located by the gate you are protecting. The gate to heaven no less. With the exception of the first few rounds, the break between each round will also give you an initial two chests, with more to be unlocked with achievements, from which you have the option of choosing a blood of the lamb to heal the gate for two health points and a randomly generated trick arrow. Should you have enough money, nothing is stopping you from buying everything afforded to you.
The incursion arrow and keeping your gate’s health maxed out for as long as possible should be your focus here. Incursion is a proximity mine, fire one at the mouth of your gate whenever you have one available to give yourself a failsafe should a powerful knight make their way past you.
The mode is currently separated into two chapters. The first one having three settings that are functionally the same, but amazing changes of pace nonetheless. It is Chapter 2 where new mechanics begin to be introduced per level.
Both chapters share the initial fodder. Returning from our bout in the Main Mode we have our easy to take down Abominations, our heartier and varied templar knights, quick moving skeletons that should always be the first to go, and similarly quick flying skulls that can double as a boon as a well placed shot will take out close enough enemies in a large blast. While not a threat, orphans will periodically run through the map for a very brief period, managing to hit them will net you a random trick arrow to add to your current collection.
In addition to all this, you have the option of expanding your score and gold-purse through trick shots. Combos, Sniper shots, elite sniper shots, the gratifying gap shot. There are plenty to discover and shoot for, just be careful not to focus too hard on tapping into your inner Robin Hood that you forget to keep track of how many enemies are running down the multiple pathways they take
Chapter 1 is separated into three levels modeled after Purgatory(Saints Approach), Paradise Lost(Lost Passage), and the Abyss(Ruined Bastion). The waves become increasingly difficult and larger in number with each wave but otherwise are not different between these maps..
Chapter 2 is where you begin to be kept on your toes. The rounds initially start with the enemies stated above and continue this trend through each wave. The difference is based on the map you picked. There are only two as opposed to the last chapter, Anakim’s Advance will have the big lumbering oaf himself start making his way through the map, needing to be taken down with the fodder crowding in around him. The second map, Nefarious Invasion, includes a new summoner creature capable of replicating whatever enemy its glowing ball will hit. This is sometimes to your benefit, as this will multiple orphans too. The summoner can be taken down without much hassle otherwise, it keeps itself cooped up on one of three platforms which it teleports around to keep you on your toes.
FAQ
Question: What is the Difference Between In Death and In Death: Unchained? Is Crossbuy Available?
Answer: In Death is the PC version of the game. While it has better graphics, it has otherwise been abandoned in favor of In Death: Unchained. It is due to this that cross-buy is not available as they are technically rhe difference between the Early Access and complete build. The many added levels, the Siege of Heaven mode, and the skins you can unlock between seasons are not available on In Death’s pc version. It is heavily recommended you focus your energy and money on In Death: Unchained.
Question: What are In Death: Unchained’s Included Accessibility Options?
Answer: Both seated and standing options are supported. Your dominant hand can be switched on the fy in the settings menu. Continuous movement or stationary movement can be toggled, along with allowing movement to be based on headset direction. Turning can be swapped between snap and continuous and also be adjusted. All of these options and the teleporting nature of the movement system means you will have no issues with motion sickness.
Question: What is the Best Strategy to Unlock the Abyss in the Menu?
Answer: First focus on Beating Anakim six times to unlock Paradise lost, then focus on beating Gabriel. It is in your best interest to attempt to beat these maps without taking damage at least once, though these will not be crucial to efficiently unlocking the 48 achievements.
At this point you should have unlocked a large number of achievements from being the reincarnation of Robin Hood that I know you were born to be as many achievements are unlocked purely from killing a certain number of enemies.
As you unlock and discover trick arrows be sure to use them liberally besides whatever set you play to keep for the bosses. Each Trick Shot has its own achievement based on use.
Tying Things Together (Cheeky Conclusions)
Rogue-lite gameplay lends itself insanely well to a VR headset. To that end there is no game that is going to give you the Divine Comedy tour like In Death: Unchained. Paradise Lost’s marble-sheened architecture and the terrors of the Abyss might seem daunting, but the addiction you’ll feel when you conquer it enough times to be able to land a arrow head right into the distant depths of their hood will have you returning enough times that’ll you’ll feel like a proper Hawkeye of the Heavens in no time.
There is a large amount to accomplish and do, with every achievement’s upgrades making you feel like you are becoming just as dangerous and unforgiving the large number should have you giddy for vindication with every endorphin sparking ding an unlocked achievement will sound during your run. If, like me, you can’t sit through a movie or show that stars a archery crack shot without suddenly having an INTENSE desire to take up archery and become the next Katniss, you can’t afford not to have this title in your library. Thanks to my time in the spotlight as your Virgil, my sweet Dante-stand-in of an reader you, now you are more than prepared to take up the task.
Now get out there and save Beatrice! Wait. No. The CREATOR. Get out there and save the creator! This is why you avoid Alighieri jokes, they stick in your ribs.
Continue reading: