
- Half Life Alyx Character Guide: The Only Character Guide You’ll Need - May 24, 2022
- Painting VR Review: The Mad Science of Painting - May 20, 2022
- Cities VR Review - May 10, 2022
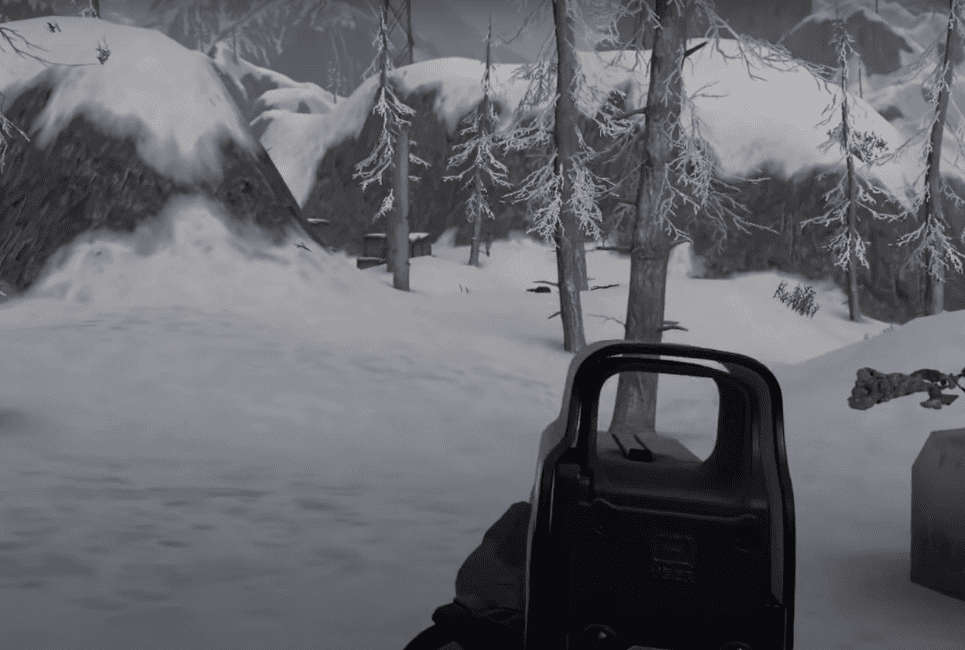
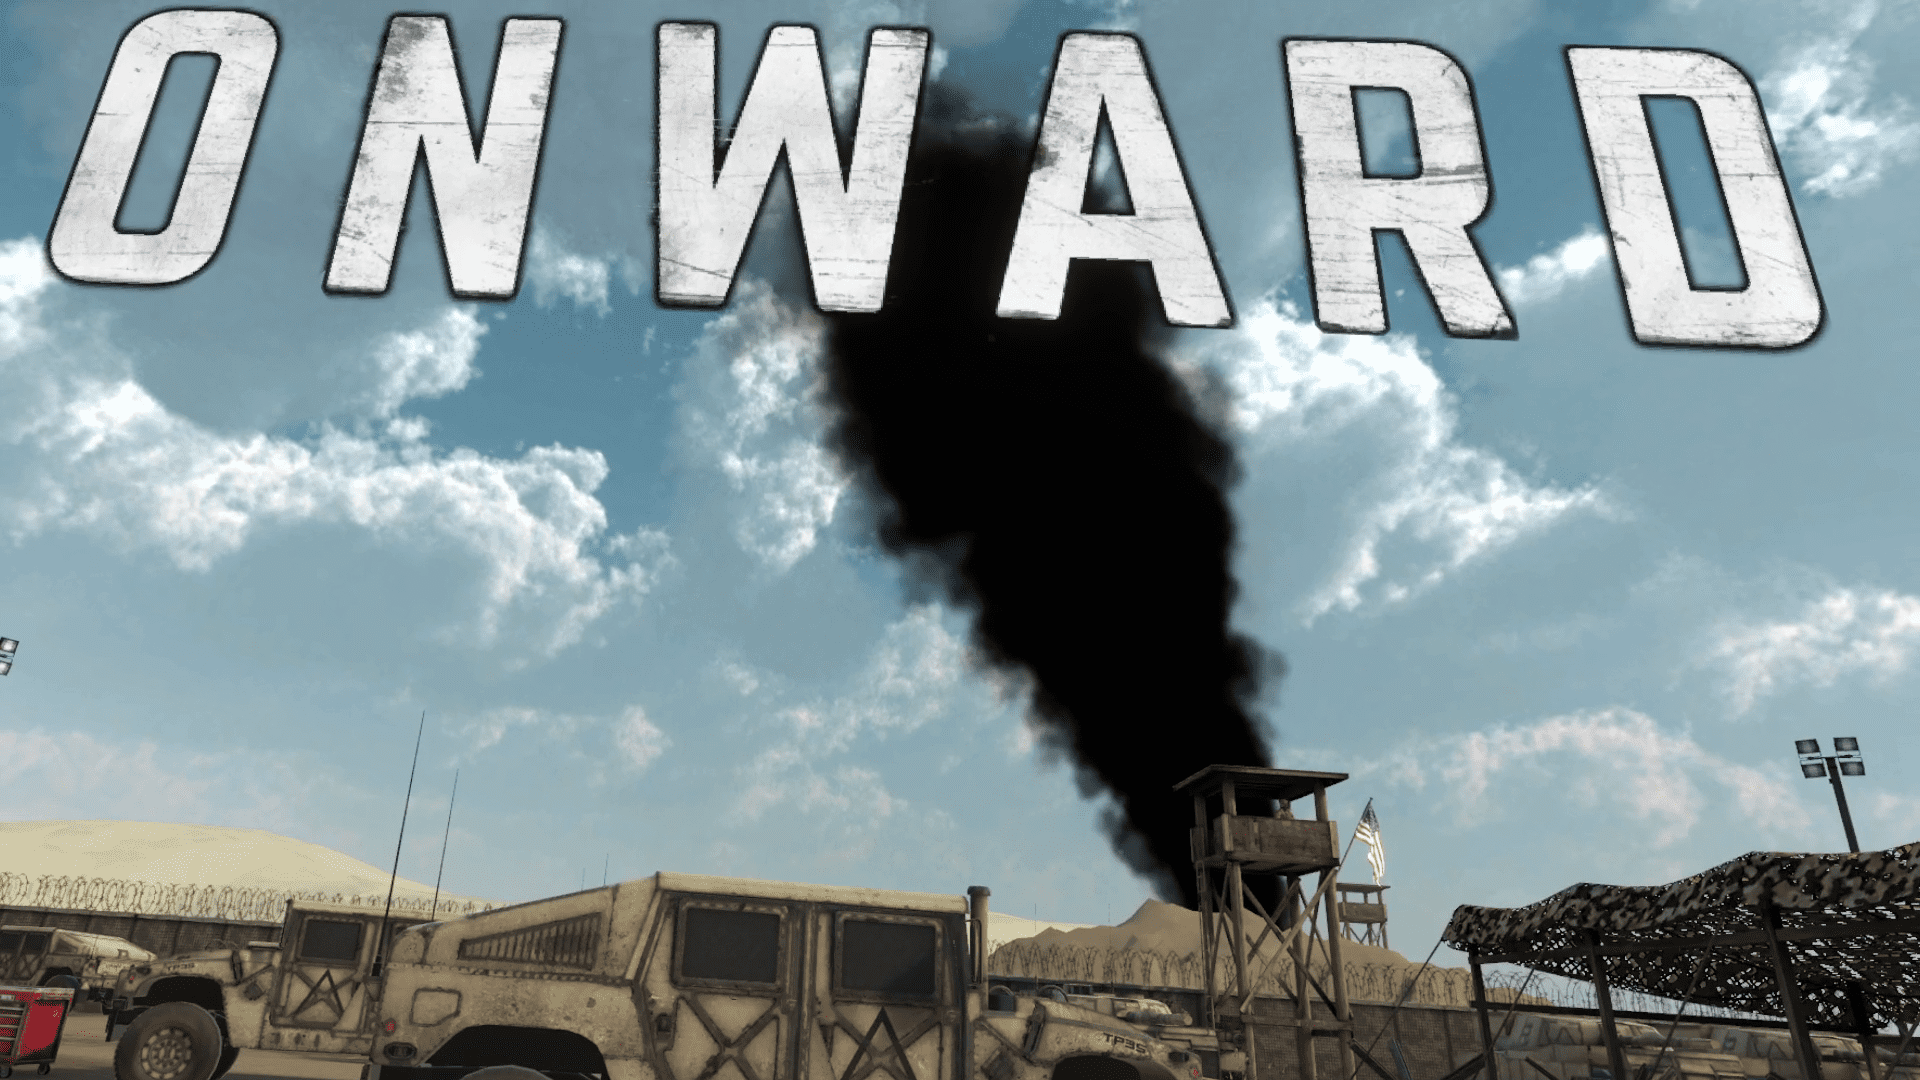
CADETS! The air is alive with sand and gun smoke, your ears are ringing from the sweet cacophony of gunfire, and you swear the soldier next to you couldn’t hit the broad side of a barn. Welcome to Onward Vr! A Mil-Sim Vr Shooter that will shock you with the level of detail in making you feel like a brother in arms, and I am here to guide you through these terrifying battlefields.
I am Major General Boots, and there is a reason I have been sent here to train you cadets on how to handle a firearm and raid the battlefield! See, I was raised on target shooting. Molded by it, you might say.
I was raised and trained in how to handle and shoot several guns on a range. Thankfully, with all this worldly knowledge, it has made me one of the deadliest shots in the virtual world.
Now I am going to guide you on how to be the same. So listen up, soldiers!
Bottom Line Up Front
- Change the locomotion from ‘off-hand’ to ‘Head’ and rotation to ‘snap’ in the settings menu.
- Before jumping into the main game, go to the shooting range to familiarize yourself with your favorite gun and set up your loadout.
- Always keep an open line of communication with your teammates.
- Know your weapon and practice reloading it, as this will take muscle memory to do quickly.
- When firing your weapon, remember the Figure 8 Method.
- If using a fully automatic or burst fire, aim at the center of the chest as the chances of a headshot will dramatically increase as the rate of fire brings the gun’s barrel upwards.
- To drastically reduce recoil, press the thumbstick of the hand holding the weapon to change the firing mode to single-shot. Pulling the trigger will still fire like an automatic, but you will have more control over where your shots land.
- To use a belt-fed gun like the m249: grab the top of the weapon and pull open the chamber. Then use the ammo belt from the magazine to reload.
- Think like a deer. Use the sound of gunfire and its direction to locate your enemy. The 3d audio is intuitive like that.
- Use cover whenever you can. Be it vertical like the side of a door or horizontal involving a couch, never take cover for granted.
Locomotion Settings
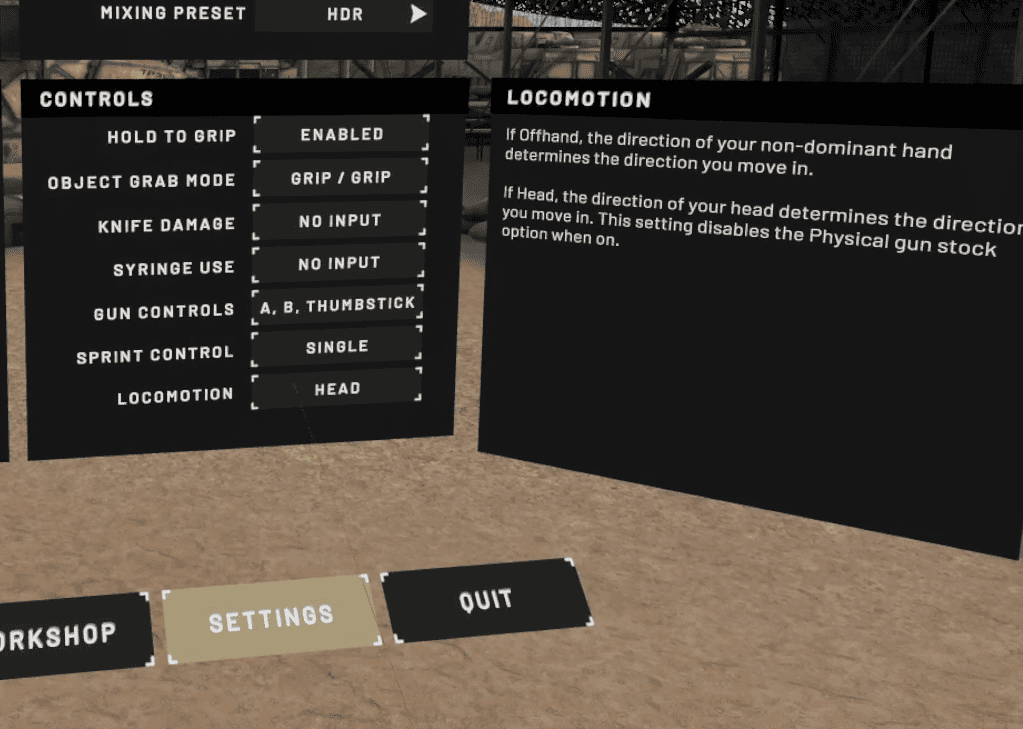
Onward might initially start with your rotation settings on smooth and your locomotion set to off-hand. This can be a problem for people with motion-sickness or might just be generally disorienting.
Change the rotation so instead of smooth-turning, where holding the rotation thumbstick will keep you turning smoothly like in a flat-screen game, it is on snap-turning which will cut out the frames of your rotation and have you immediately turn to the direction based on the number of degrees you choose.
Change Onward’s locomotion to Head so that instead of moving when you press the movement thumbstick based on the direction your off-hand, and as such the front of your gun, is pointing; it will instead move based on where your head is facing. This is the best way to combat motion-sickness in most games.
Gear
Onward might initially start with your rotation settings on smooth and your locomotion set to off-hand. This can be a problem for people with motion sickness or might just be generally disorienting.
Adjust these settings so that the direction pressing forward moves you is instead dictated by the direction your head is facing. This is the best way to combat motion sickness in most games.
Radio
Cadet, I will need you to hold either hand up to your left shoulder and hold the trigger to kick on your radio. Hear that satisfying static? The charming crackle? Good. This will allow you to speak to your teammates over long distances. Keep holding the trigger until you are done talking.
Wounded soldiers can still use their radio if they can reach it. This can prove helpful in alerting your team to your murderer or incoming enemies.
You must communicate with your team. I am not talking long deep conversations, though some like myself instead enjoy them; what I mean is strategic teamwork, soldier!
For some ideas on what to say over the radio, consider the following.
- Your position and subsequent plan of action.
- Any enemies you aren’t confident you can dispatch quickly or if you come across multiple enemies.
- Snipers or camping enemies.
- Freshly thrown grenades, but try to call it out the moment you see it. You never know when someone’s cooked a grenade.
The Knife
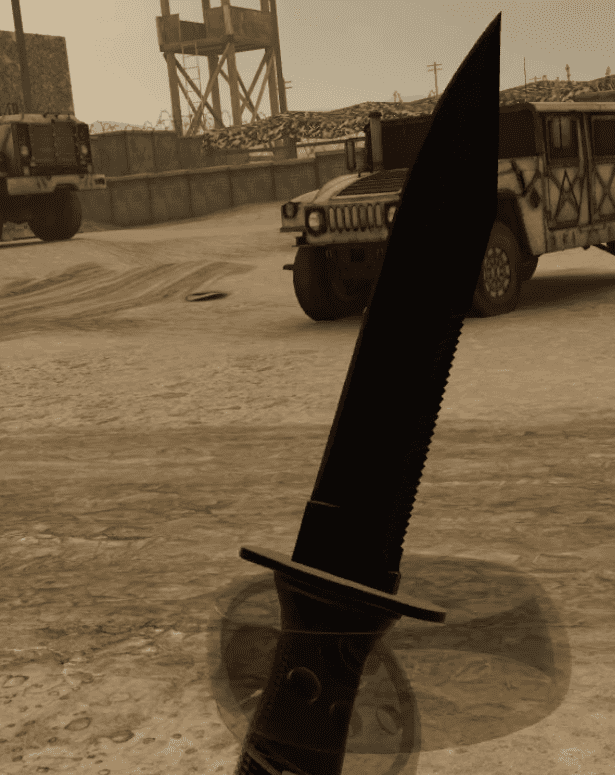
If you reach for your left shoulder and use the grip button instead of the trigger, you will be able to use your knife. Be careful; it will damage anything but the one wielding it. It is an aggressive piece of metal, so be careful with it around your teammates.
Seriously, it will harm your teammates.
The Tablet
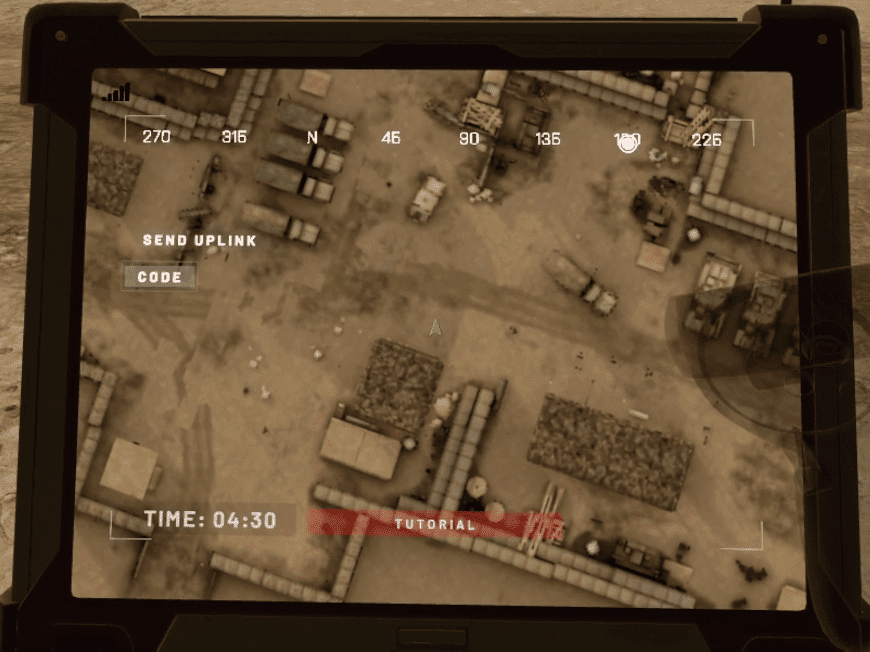
Reaching behind your back or over either shoulder and pressing the grip will let you grab your tablet. The primary use of the tablet is your map.
Your team will be shown as colored dots which correspond to their health. For example, green is full, yellow is injured, red is critically wounded, and a red cross is a fallen soldier who can still be revived.
The objective will show as a large white dot or symbol.
You will also use your tablet to complete these objectives, such as inputting a code to the Uplink. You will have to click on a menu item on the tablet to see the code, back out, then click the menu item above it to input the code. So try to remember it.
The Syringe
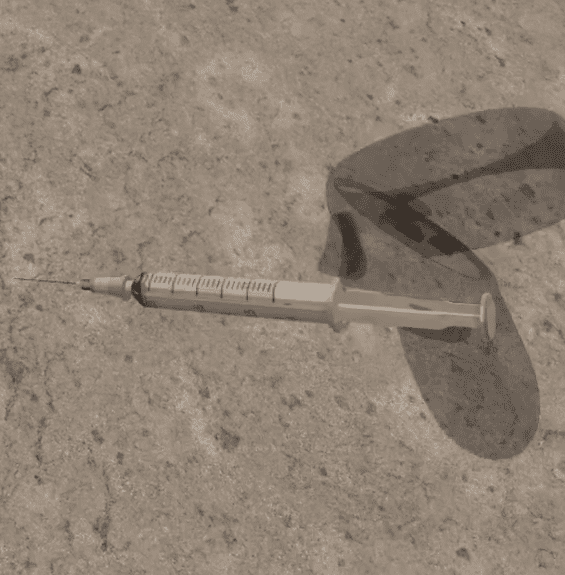
In Onward, we have exceptional medical care. So every soldier always spawns in with a syringe. This can be used to stop bleeding, noticed through the darkening of your vision, but it can also revive injured teammates who aren’t dead.
The Syringe can be grabbed from your right hip using the grip button. Extra syringes can be added to your loadout.
Grenades

Grenades can also be found on your vest. Snag them with the grip button, then use the trigger on the opposite hand to snag the ring and pull the pin. Now, the grenade won’t explode yet. The countdown hasn’t even begun.
Throw it to have it countdown normally. The usual countdown for a grenade is 5 seconds.
Press the right joystick to cook the grenade. The countdown starts while you are still holding it and WILL go off in your hand. This can be highly useful for catching your enemy by surprise. A cooked grenade, when used right, will give the enemy no time to run and take cover.
Guns: Getting Good
Reloading
Depending on what gun you are using, your method of reloading might be mildly different. Your standard weapon will require you to hit the A button to release the magazine, grab one from your ammo belt on the left side, and snap it in.
Meanwhile, some weapons will require you to hold the A button while you reach up with your off-hand, grab and pull out the magazine before reloading.
To chamber the round, press the B button (main-hand) or grab the charging handle with your hand and pull it. The charging handle may be in a different location depending on your gun
– The semi-automatic pistol requires you to pull back the slider on top.
– A rifle will have it located along or at the back of the barrel.
– A Pump-Action shotgun requires you to yank the grip found across the barrel’s bottom.
Not all weapons will require you to charge them upon reloading. You can also COMBAT RELOAD the gun. If your magazine hasn’t been spent or you have only one round in the weapon, reload but do not pull the charging handle. This gives you one extra bullet and no need to charge the gun.
Getting the muscle memory to quickly reload a weapon like a Call of Duty character takes practice and knowing your weapon. Some magazines will be shorter, or the charging handle will be completely different.
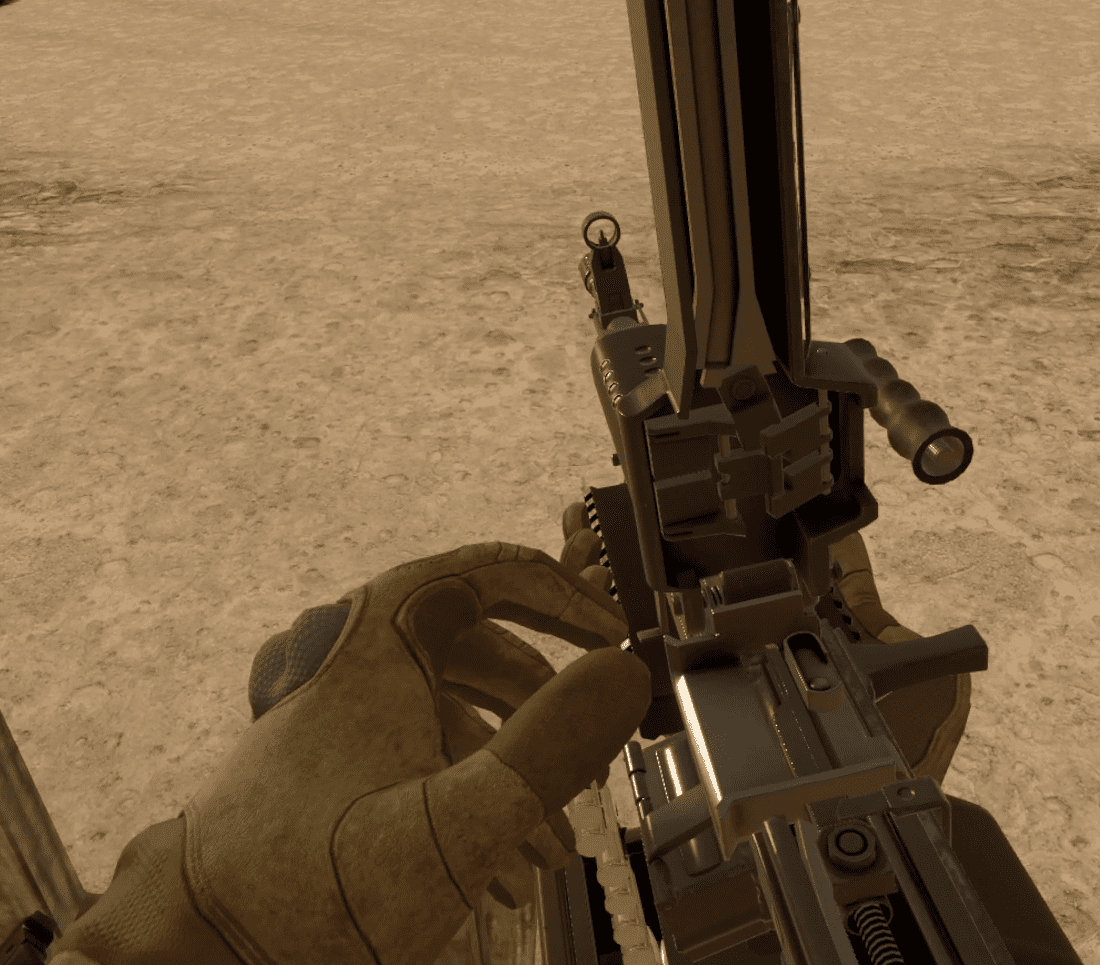
The final thing about reloading is that certain guns will take a different reload method. For example, some shotguns will require you to quickly load them one by one along the bottom. Others, like the M249, will require a mildly more complicated approach.
To reload the M249 in Onward:
- Remove and replace the magazine.
- Grab the top of your gun using BOTH the trigger and grip buttons.
- Pull upwards until the inside of the chamber is revealed.
- Grab the ammo belt and lead it onto the charging port.
- Snap the top back on, pull the charging handle on the frame’s right side, and let ‘er rip like a Beyblade.
Steadying Your Weapon
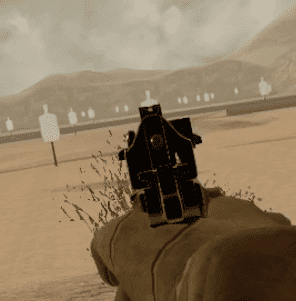
It might seem like you just point the gun at what you want dead and fire, but that’s just how the gun works. Not how we make you work the weapon. A gun’s accuracy is delicate. Just a tiny fraction of the angle between the front sights and the rear sights will drastically alter the course of your bullet. So here are a few tips on keeping your weapon steady.
- Use the grip button to hold the front of your weapon or the gun’s grips to steady your aim and reduce recoil. You can also grab a pistol with two hands, and thanks to how much a gun will jump in one hand, it is highly recommended.
- If you find your hands shaky, do not fret. ROTC taught me a trick. Some call it the figure 8 method. You want to picture a figure eight with the lines in the center of the eight intersecting right on your bullseye. Imagining the 8 will help you dial in that shaky hand, and waiting for your sights to line up on your target will help teach you the rhythm for the next tip.
- Control breathing is a must for real guns and can significantly assist your chances of making a shot. The idea is to only pull the trigger as you exhale. Taking a breath in can cause your shoulders to rise and your muscles to faintly tense, while exhaling relaxes the body and helps you enter the flow state. This practice, for those familiar, is opposite to the energy of a martial artist’s practice of letting out an exclamation as they throw a fist to tighten their muscles.
- Preferably, once you are used to the habit, you will pull the trigger at that perfect moment of body stillness between your inhale and right as you exhale.
- Aiming a gun is all about a steady stance but not a locked stance. Keep your feet shoulder-width apart with the leg opposite your firing hand facing forward. Your toes should be pointed in the same direction as the gun’s muzzle.
Attachments
Until you are relaxed shooting a gun, you should close the eye opposite your trigger finger. Once you become comfortable with it, you will be able to use a holographic sight like a cross-hair in your field of vision with both eyes open. Then, you will be able to fire a gun based on how it is angled from experience alone.
Practice makes perfect, and the shooting range is ideal for that.
Please note that some accessories are not available for all guns or load-outs.
Gun Sights
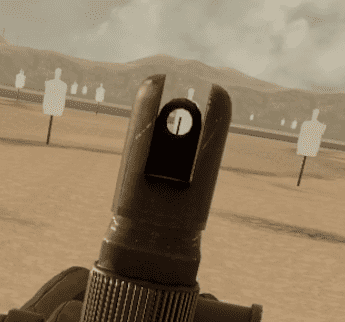
- Iron Sights
Iron sights are your weapon’s built-in sights. These come in three forms.
Open Sight
The rear sights might come in many forms, but you need to know that there are two raised points like a U or a V. Meanwhile, the front sight is a single post. So line that post up between the two raised points of the rear sight to be absolutely level.
The front sight needs to be angled with the target, while the rear sights need to be angled with the front sight. Imagine a circle. The front sight would act as a radius, going from the center to the edge.
Rear Peep Sight
Circles on the top of your gun might seem new and scary, but don’t worry, soldier, it is the same as above. Now, the circle analogy has come to life! Fear my power and how I bring fiction to reality with my metaphors later. Finally, we got the iron-sight you might have issues with.
Double Aperture Sights
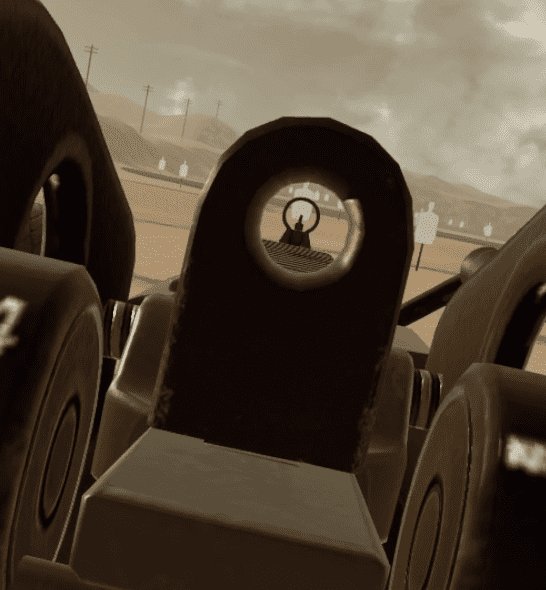
An Aperture sight is just what the circular sight is sometimes called. In this case, both of the sights are circles. Without the post, how do you aim it? By lining the circles up, of course! These sights are more commonly used for target shooting than war, but cut-backs and what have you.
To aim them, line the rear circle up with the front circle inside, centered, so it isn’t touching any edges. Then line your target directly in the center of that.
- Red Dot Sight
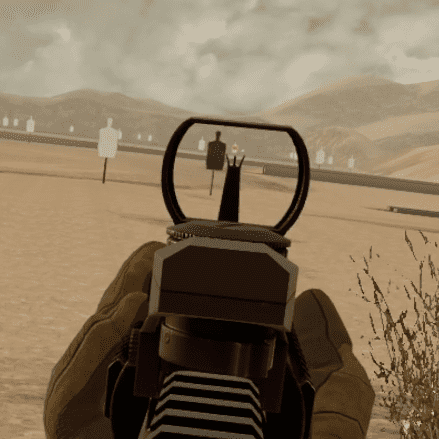
The next step in gunsights is the Red Dot Sight. As the name implies, a very simple cross-hair is a single dot. Now center that dot against your target and fire. This sight gives you a greater field of view and fewer visual distractions. If you find the red-dot hard to focus on, luckily, there is our next type of gun sight.
- Holographic Sight
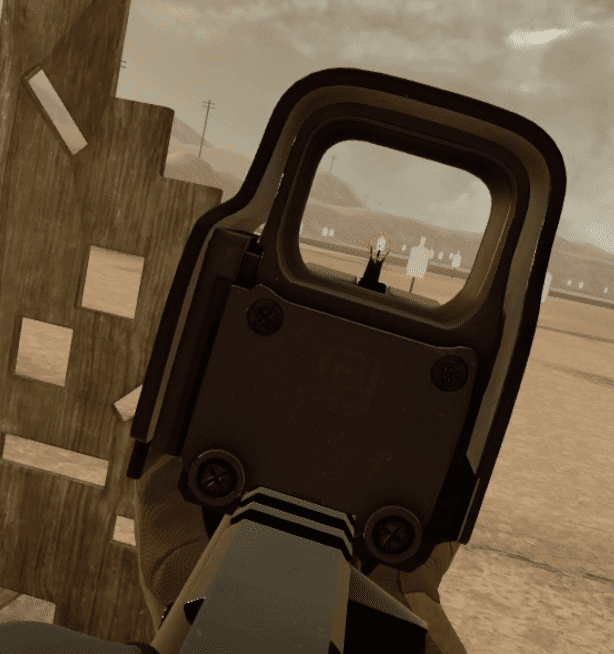
A holographic sight is, in function, much like a red dot sight, only with a more pronounced crosshair. This is personally my favorite type of sight, and I use it for every kind of gun game that gives it to me as an option.
With enough practice, a holographic sight can easily take down a target at a supremely far distance. Just put the Lil dot over their head or, if too far for that, the dot that represents them. IF they are moving, place it a little ahead of their direction.
- Sniper Scope
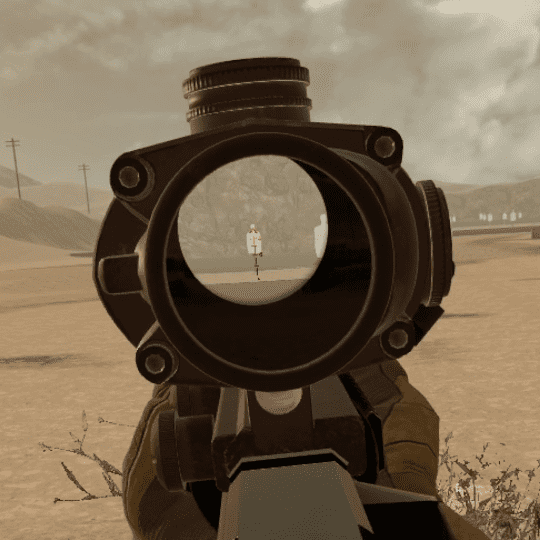
It’s like a binocular, but for your gun!
Lemme level with you. I don’t use sniper scopes much. There are some absolute gods of the sniper scope. Still, I always preferred the holographic sight in any situation while shooting that would need a sniper scope. For these reasons: assault rifles usually have better firing rates, and the shape of a sniper scope will cut out your field of vision.
Nothing matches them in being able to see a long-distance target, though. S,o there is a compromise that I will use when a gun gives me the option. Thankfully, Onward will provide us with that option when the weapon allows it.
- Angled Sights
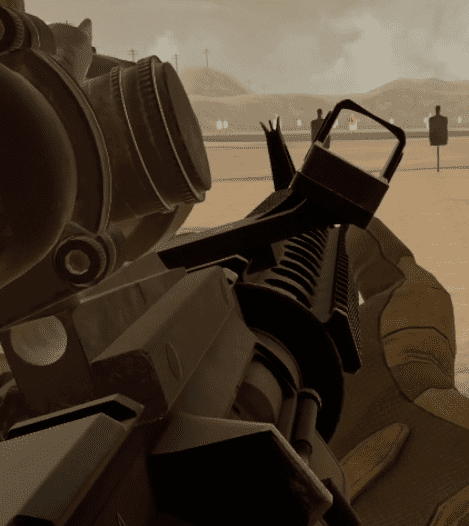
Where holographic sights are my favorite go-to sight for any gun as it is usually offered, the angled sights I consider the cream of the crop. Its only downside is that now all guns accept it as an attachment.
Coming in left or right variants based on which hand you shoot with, the sight will attach at an angle, allowing you to put a typical sight in its usual spot.
- Laser Sights

While I wouldn’t suggest a laser sight, this game shows its realism by having the most true-to-life laser sight I have ever seen. Unlike other games that project the laser sight like some sun-defying god, this one is nearly useless on a well-lit map.
Even at night, the laser sight will hardly project all but a small line from the edge of your gun. This will assist in angling your sights, but otherwise, it doesn’t have much use besides potentially betraying your position to an eagle-eyed enemy.
Night-Vision will allow you (or the enemy) to see laser sights.
Gun Accessories
- Suppressor
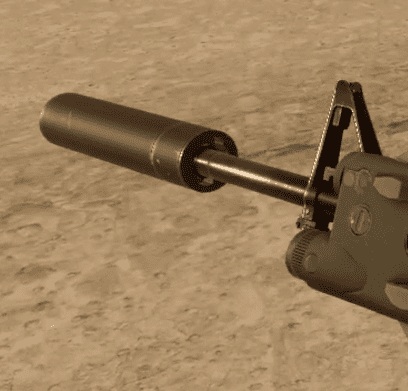
While it doesn’t completely silence a gun like action movies would have you believe, a suppressor will lower its volume and flash. Thus, the enemy has to be much closer to you to use your gun’s noise or flash to locate you.
- Foregrip
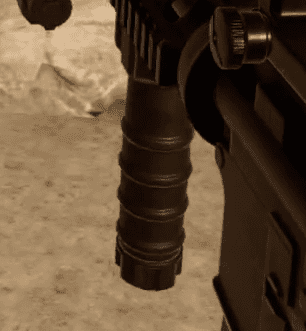
A foregrip gives you a more solid grip, in real life at least, that is both more comfortable at an angle on your handle and reduces recoil. Thanks to the shape of a VR controller, it also adds to the immersion as it feels much more natural compared to miming holding the edge of a rifle.
- Bipod
A bi-pod is an attachment that allows you to hold your gun like usual but then deploy it on flat surfaces like ledges or tables.
Using a bipod will improve accuracy. It will also free up your off-hand to use your sidearm or deploy a grenade.
Player Accessories
- Night-Vision
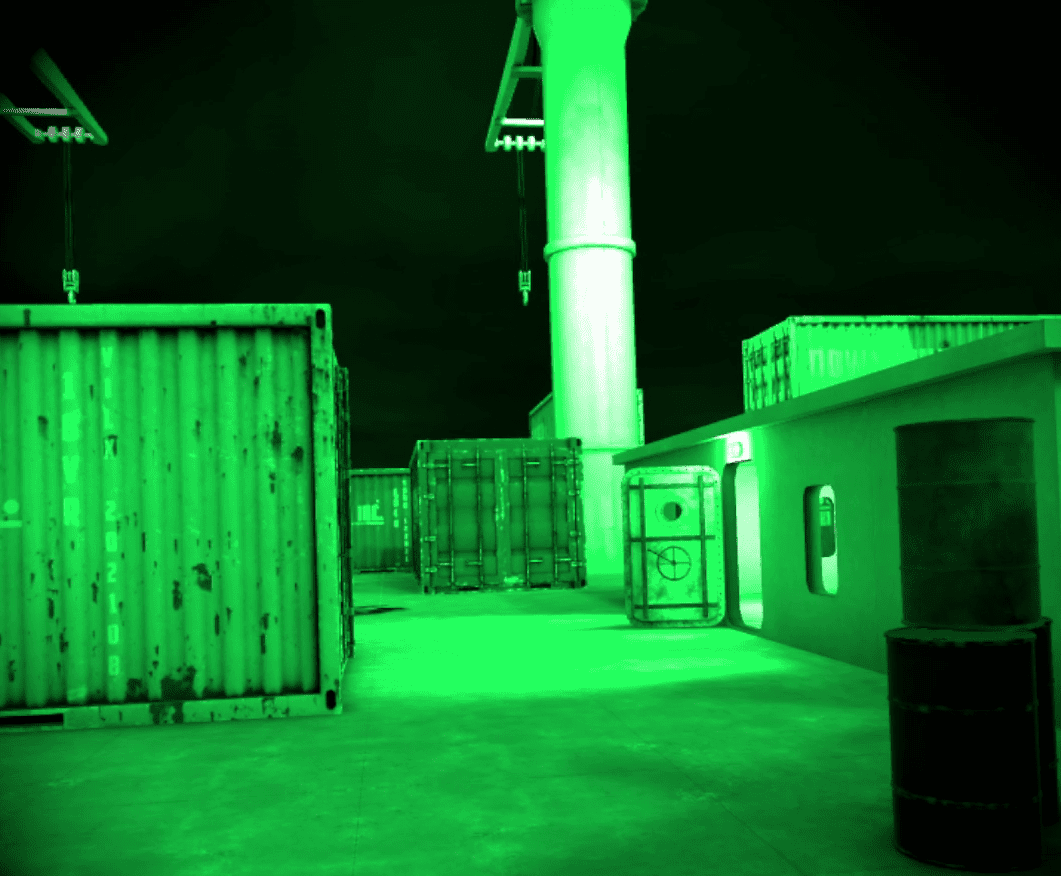
When your load-out includes Night Vision, reach up to your forward and press the trigger to activate.
This enhances ambient light to improve your night vision and even spot laser sights.
- Body Armor
Should you attract bullets or knives like mosquitoes, the body armor protects you from both. Although it reduces bullet damage, it doesn’t make you immune. Remember this. The belief that you are immune to bullets will get you killed.
- Flashlight
This is a flashlight that is attached to the barrel of your gun. This can be used to blind enemies and improve nighttime visibility.
- Shield
Available as a primary weapon instead of an attachment, it is a riot shield. PAir it with your favorite secondary weapon, and you can tank your way through enemy fire. Careful though. You can still get shot.
Speaking of which. To deal with someone with riot gear, aim to either flank shield-users from the sides or go for the feet, as players and AI rarely properly hunker down for complete protection.
- Drone

When attached to your load-out, you access the drone by pulling out your tablet from behind your back. Then, the drone is activated with a menu option on the tablet itself.
A small RC vehicle is used to scout the terrain or sky based on type. It is equipped with a spring-loaded jump to get to those hard-to-reach places in case of the ground drone and flying capabilities when it comes to the air drone.
Grenade Types
The smoke, flash, and frag grenades come with a 5-second internal countdown. Throw it after pulling the pin with your opposite hand to start the countdown.
To cook a grenade, press the right joystick to release the safety grip starting the countdown. If you don’t throw it in time, this will go off your hand, so please take care. I want those hands intact to hold an m16!
- Smoke Grenade
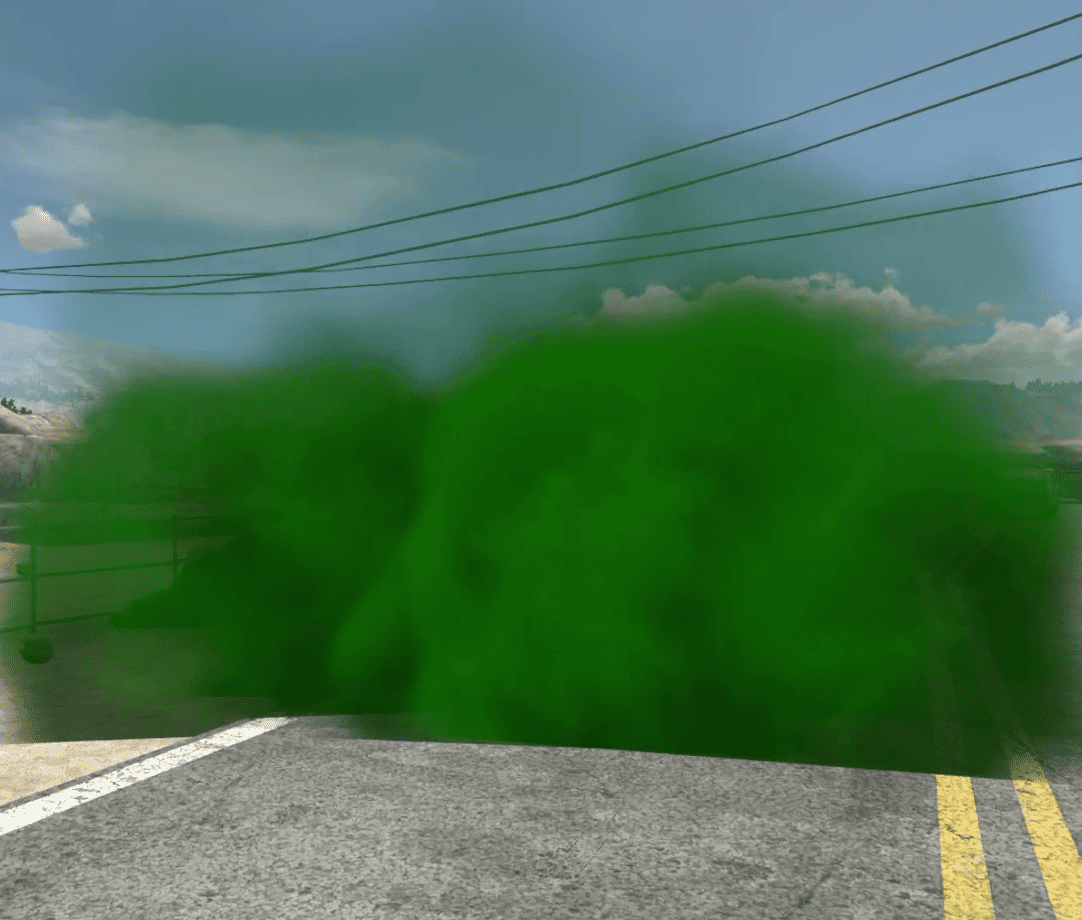
Available in white, green, or red. This makes smoke grenades excellent for marking objectives using a smokescreen. In addition, this makes it much easier to direct your teammates to a specific spot using the radio. ‘Back-up on Red’.
Besides just providing a marker for your team, you can use this to blind teammates.
- Flash Grenade
The flash grenades are used to blind and deafen targets through the power of concussive force and bright booms. It is also HIGHLY disorienting to be on the receiving end.
Practice drills for being able to take flash grenades like a champ begin tomorrow. Missing out on these classes will put you down for a spontaneous flash grenade test at my leisure.
- Frag Grenade
The classic and battlefield favorite, the frag grenade, will explode. A frag’s construction causes shrapnel to go flying through a set area-of-effect, causing damage to any and all in a medium radius.
- Molotov
A seasoned veteran of the battlefield. This is a firebomb, a bottle filled with accelerants, to be exact. Launch it at your target and have flammable liquid on the inside spread. Then the fire at the end will make everything nice and toasty.
- C4
A remotely detonated explosive. Perfect for adding that spice of tactical surprise into the field of battle.
Load-outs

In Onwards, you select four classes: Rifleman, Specialist, Support, and Marksman. Each class will come with its own two load-outs that you can further customize when choosing them. These load-outs do not change each other between roles, so feel free to experiment as that gives you a total of 8 to build in the shooting range and then switch to on the fly during battle.
It’s always suggested you create your load-outs, or at least your go-to load-out, in the shooting range before going into the main game.
These load-outs are where you select the type of gun you want and your attachments both gunwise and, in a few cases like extra syringes, as a soldier.
Each class affects what pool of guns and attachments you can select from. Each weapon and attachment will add between one to three points to your load-out total; the overall maximum is based on the mission you pick.
Being classes, these will affect how you approach the battle.
Onward Roles
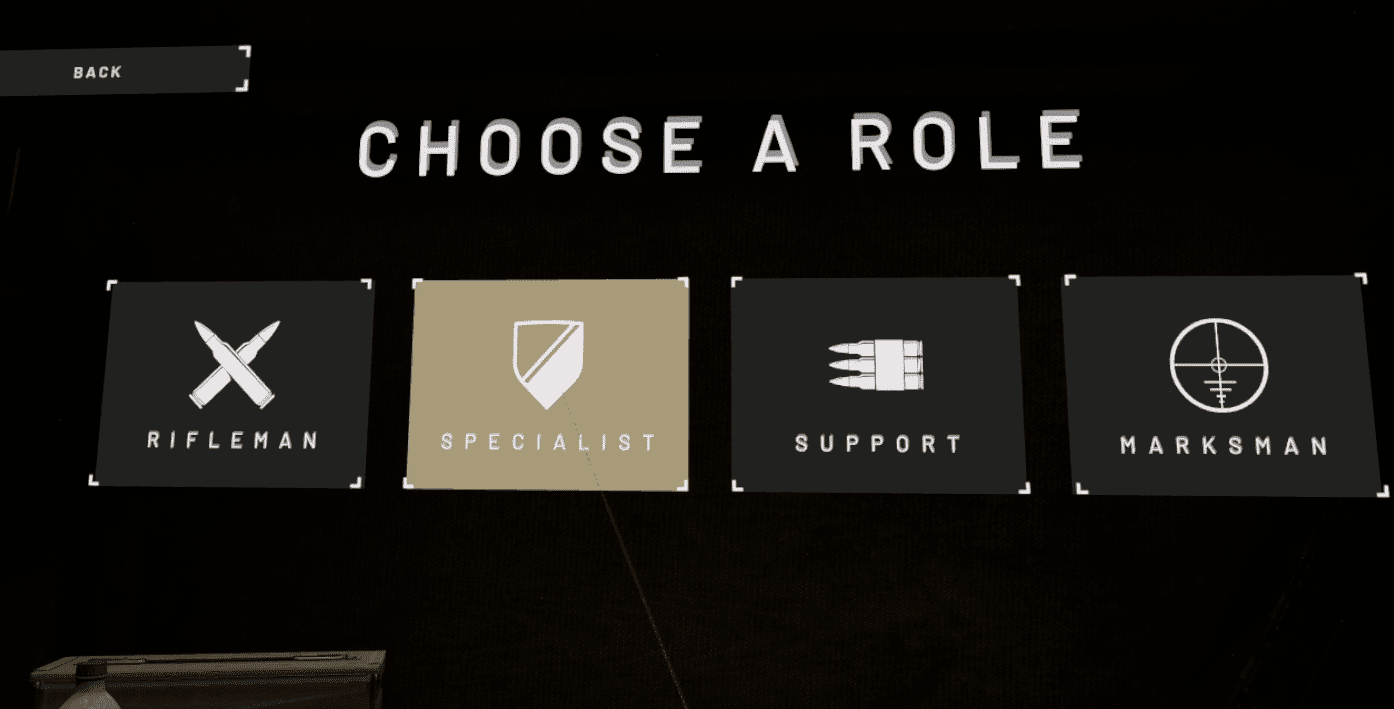
- Rifleman
A master of automatic rifles such as the m16, they are the team’s front lines. The main ones who are sent to assault an objective. This is an excellent starting class to experiment with.
- Specialist
The specialist is better for close-range encounters and leads the assault into a building or hallway depending on their load-out. In addition, they can use specialized equipment such as the Riot Shield.
- Support
These soldiers wield some of the deadliest and most powerful weapons on the battlefield. These powerful bullet-blazers can mow through and hold back entire battalions in the right hands.
The inherent inaccuracy of their heavy assault rifles and LMGs make them better suited for supporting their team by suppressing fire.
- Marksman
The marksman is both the sniper and scout of the team. They use their long-distance weapons to keep their team between them and the enemy, while they use their equipment and vantage point to scout the environment. This class is only recommended if you are better at long-range rifles or are used to VR gun games..
Game Modes
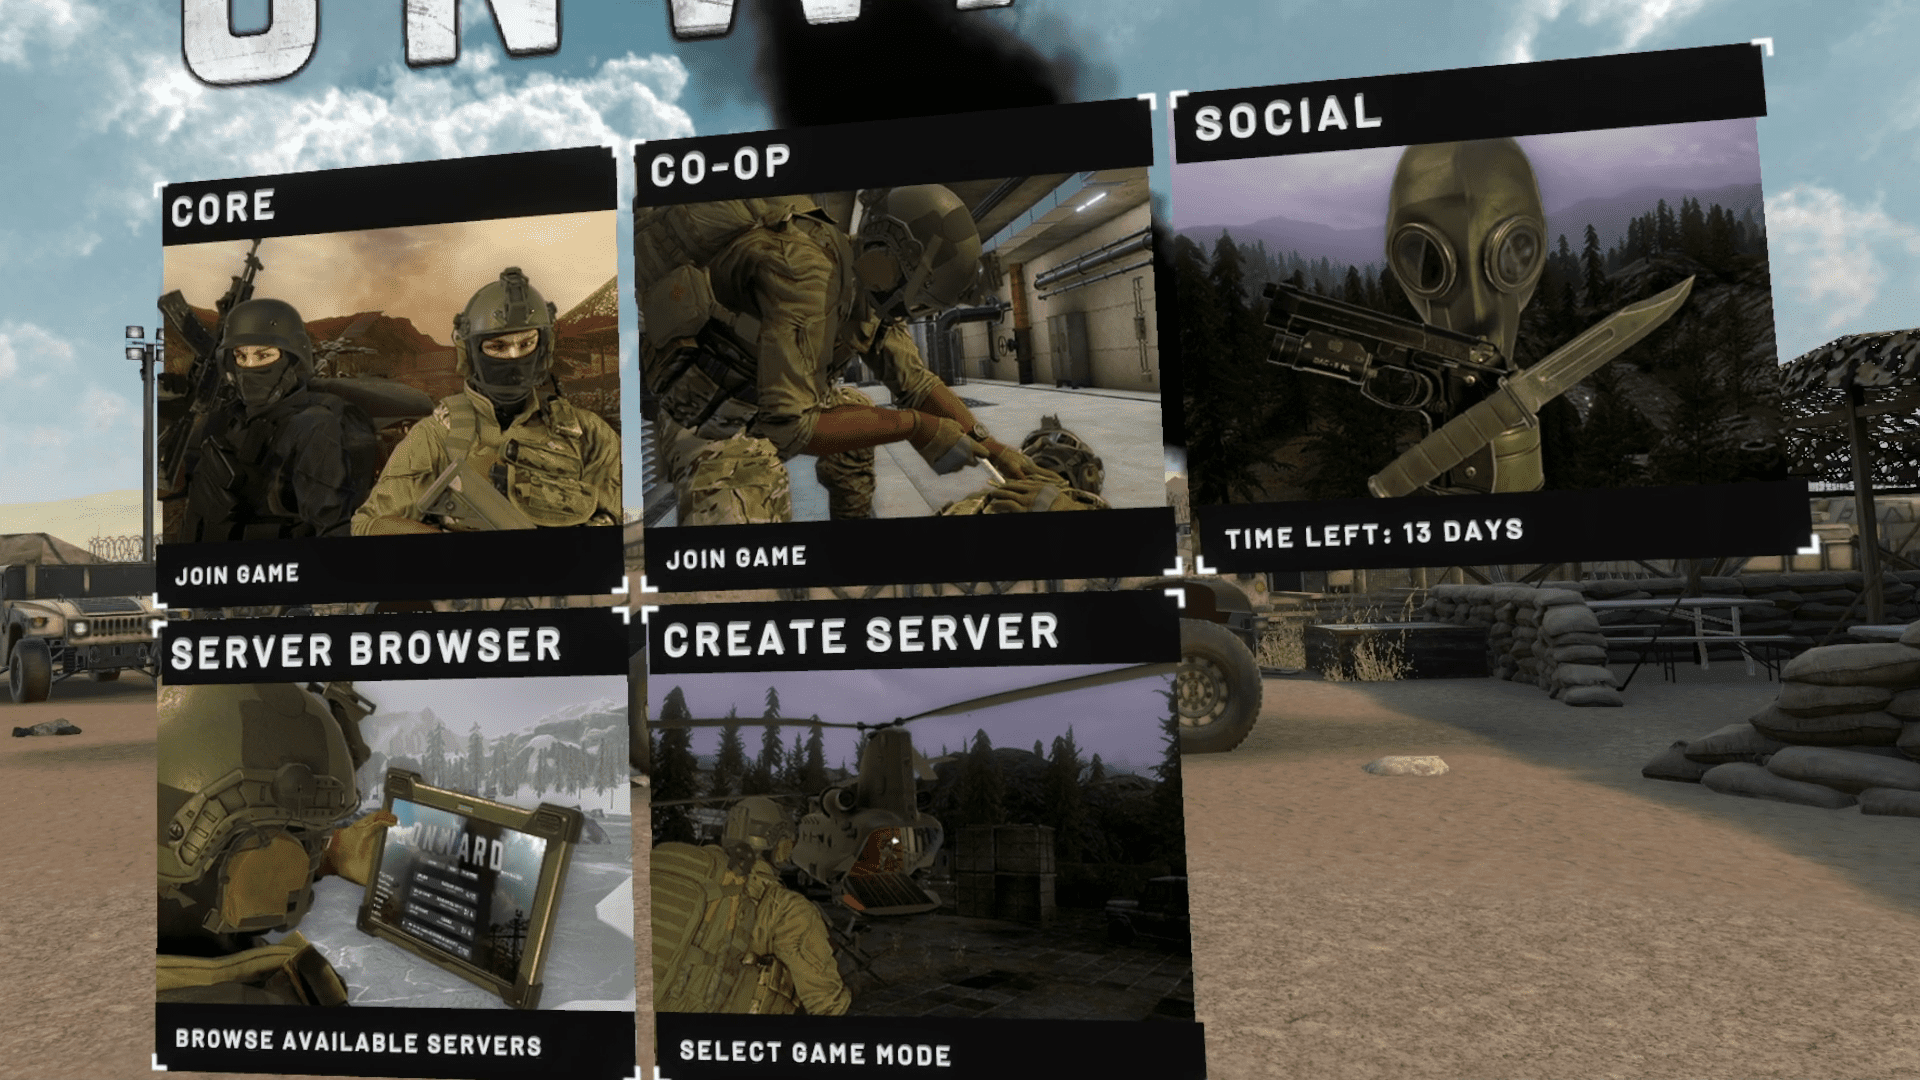
Single Player
- Shooting Range
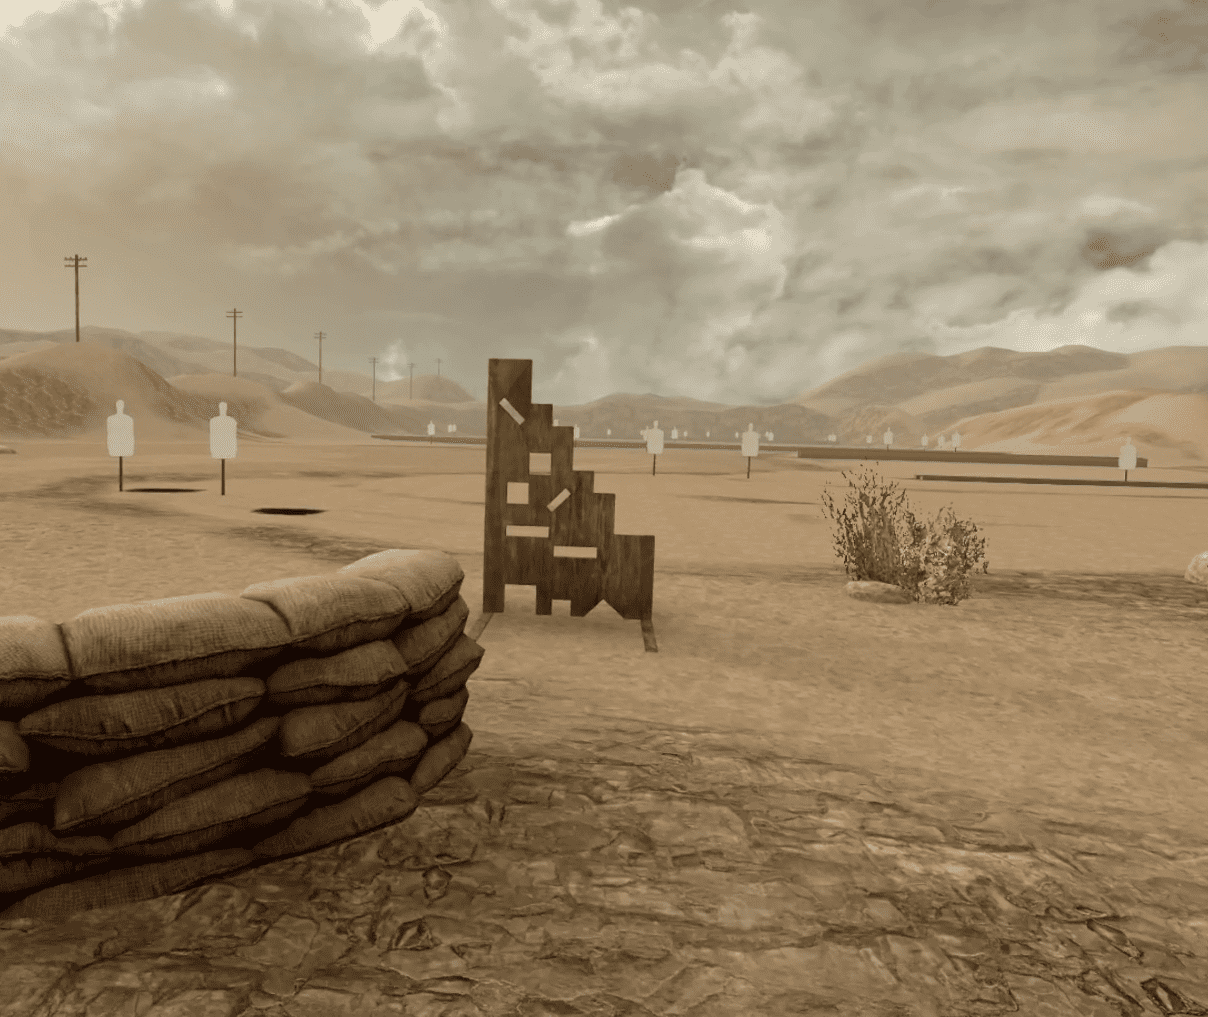
If you are new to Onward, this should be your first stop, as it is highly suggested that you familiarize yourself with the guns you have set to your preferred load-out.
The range itself is rather immaculate, I must say. A beautifully crafted Gunsite with plenty to make you feel you are on a proper military Range.
The features are what make it stand out. They are simple and few but everything you could need in a shooting range of this style.
The targets themselves are standard range Silhouette targets made of cardboard. Many of them are scattered down the range giving you all the dynamic practice you need. Multiple targets are sliding side to side for that added difficulty.
What makes this range stand out is the dynamic feedback you get. First, each target you hit will change from white to black on a successful shot.
Second, to your right, while facing the range, there will be a large picture of the silhouette targets. When you shoot one down the range, it will show exactly where you shot the last target your hit.
- Operations
Operations Mode comes in two flavors which you can switch using the mode options found along the edge of the table in the load-out menu.
Hunt
Hunt is your tried and true ‘kill-em-all’ mode. It is an excellent way to practice, but these bots mean business. The problem is that these maps can be huge. So they mean business in a vast spread out area. So I advise you to increase the number of enemies you must hunt down to higher than the starting 4.
The maximum number of bots you can hunt in Onward is 128.
Evac
The player spawns with more syringes in this mode. This one is Onward’s survival mode. Pit yourself up against an unlimited number of enemies
- Free Roam
Explore any map without bots, objectives, or time limit to disturb you. This is an excellent way to admire the game’s wonderfully detailed maps for discovering new firing positions and pathways you might want to use with your teammates.
Multiplayer
- Assault
Using your tablet, you and your team need to locate the objective and input the uplink code. The other group is out to stop you, which is easier than you would expect as the code is located on a separate menu to the Uplink input menu. It can be 7 numbers or so.
So do the intelligent thing and work as a team so one can call out the code using their tablet while your teammate uses theirs to type the number in. That, or be good at memorizing sequences of numbers.
The Uplink can take 30 seconds to send, and one member of your team needs to stay nearby during this time.
- Uplink
Precisely the same as Assault but with no respawns with one life per round.
- Escort
One player is the VIP, who the rest of the team needs to escort to the safe point. Unfortunately, the VIP is equipped with only a pistol; they are also the high-priority target of the enemy team naturally. So you’ll need your wits about you to keep your VIP alive. Hopefully, you also have a VIP with a high survival drive.
- Co-Op
A Co-op version of the operations missions found in Single-player. For more detail, please see the section above. When playing with one or more friends, it is definitely advised to up the bot count.
- Shooting Range
Hone your skills with your buddies.
It is merely a multiplayer version of the shooting range. Please see the single-player section for more info.
- Free Roam
Explore the maps with your friends without any bots disturbing you.
Once more, this is merely the free-roam option in Single-player but with your friends or player-controlled strangers.
Workshop
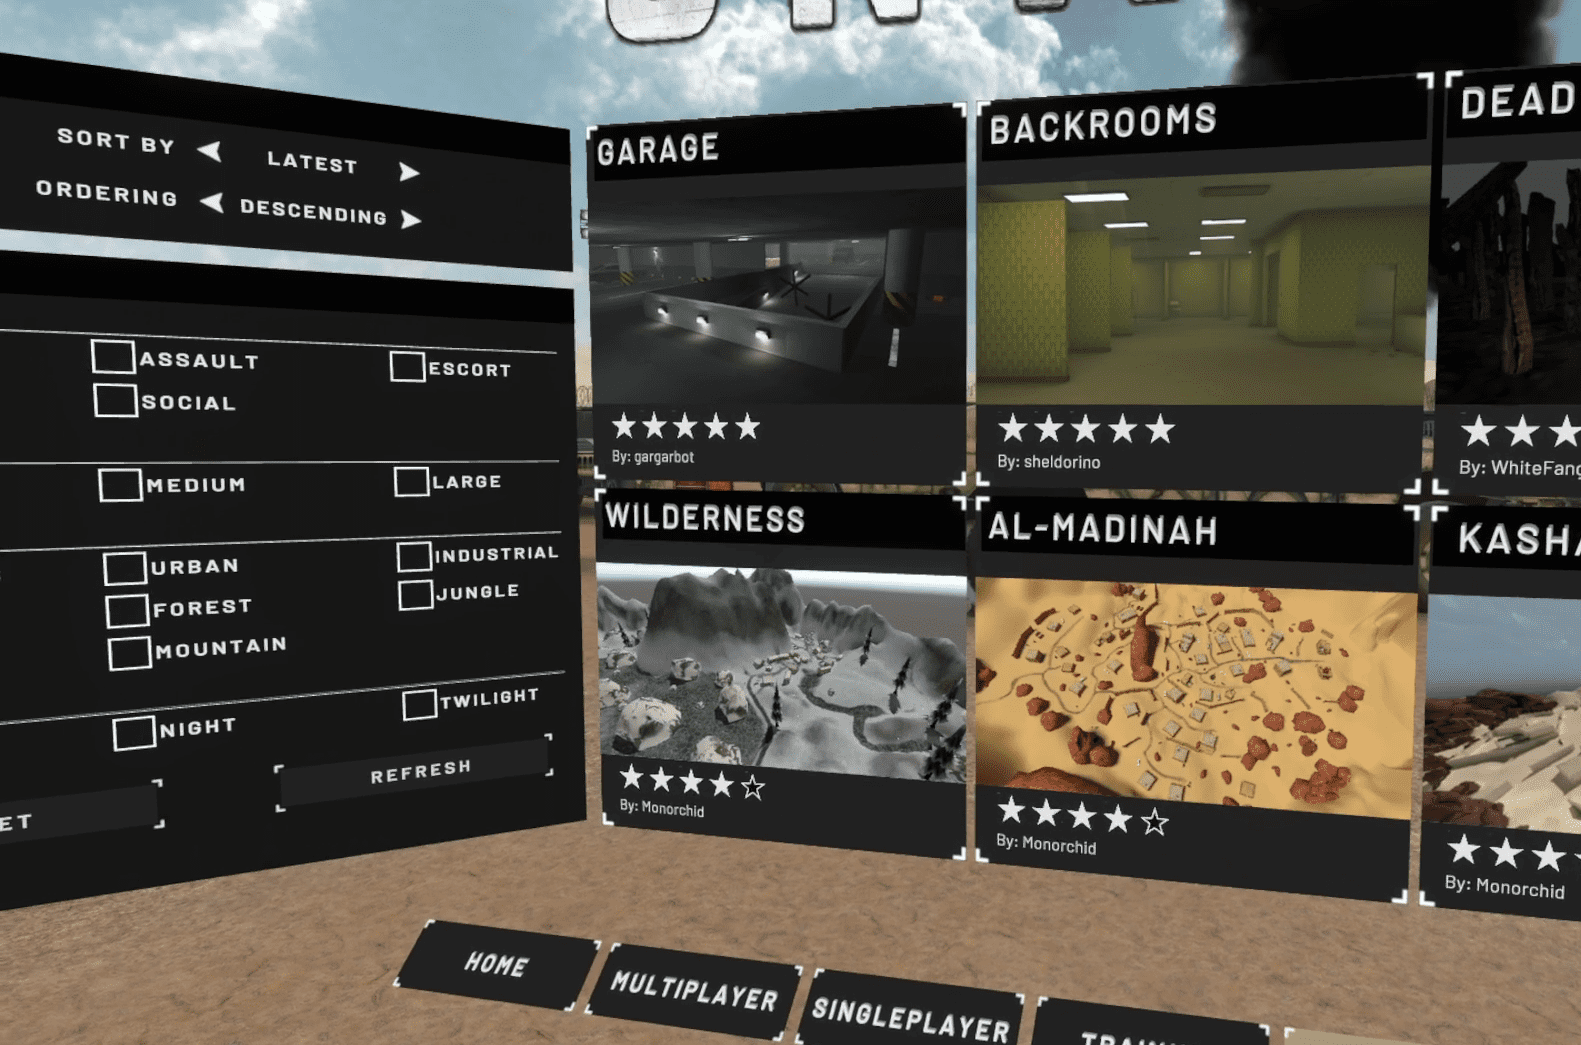
As should be expected, and honestly demanded, of a VR shooter, the developers gave the option to download and select maps. However, unlike many games, they put the function right in the game!
It comes complete with a useful sorting feature to adjust your sorting parameters. For example, select which game modes you would like them to be available in, the size of the map, the environment it is based on, and even the time of day.
Some of you might be excited to know that the Backrooms are an included map.
FAQ
Question: Will I Need a Gunstock?
Answer: No. While I have a gunstock, I can say it can improve your aim, it isn’t necessary, and I rarely use mine.
For one, it makes handling equipment more difficult.
Second, it really puts pressure on your shoulder. While nothing compared to a rifle’s recoil, it will still get sore after repeated long sessions.
The final reason is this, you don’t really need it. Suppose you start playing a VR shooter without a gunstock. In that case, you will, with practice, come to intuitively hold your hands like you were actually holding a gun, including turning.
Still, a gunstock may be a good purchase for you as it will significantly improve immersion and truly does assist in aiming. Especially a novice to proper gun stance and guns in general. It will help you build muscle memory for when and if you remove the gunstock from your arsenal.
Question: What Systems can I Find Onward on?
Answer: Onward is available for PCVR through SteamVR and PCVR. It can be found for Headsets through the Oculus/ Meta Marketplace for the Rift, Quest, and Quest 2.
Onward does not appear to be on Playstation VR.
Steam Link
Meta Oculus Rift Link
Meta Oculus Quest Link
Question: What’s the Difference Between Onward PC and Onward Quest? Does Onward have Cross-buy Between the Meta/Oculus Rift and Quest Marketplaces? Which Should I get?
Answer: No, sadly, Cross-buy is not available for Onward. The reason for this is that the two versions, the PC and the headset versions, might be similar in gameplay. Regardless, they have vast graphic fidelity differences and, most notably to why Cross-buy is not available, were made by different developers.
In my personal opinion, you should only buy the PC version of Onward if you have a choice. A headset version is available and is regarded as passable beyond its graphic problems. Still, there are better options out there for the headset. While the PC version has fantastic graphics and is a very worthy shooter in its own regard.
Get the PC version.
Conclusion
Onward is a serious Military Simulator that puts a lot of love and effort into its details. All of the equipment and attachments have been added with assisting your abilities behind the weapon in mind. The maps already come in many varied levels, but if none are to your tastes, it even has custom content!
There are many shooters that you could own. Still, I recommend Onward if you seek a challenge or a bit more realism to your virtual gun smoke. While it may be difficult, I hope I will make this one of your favorite games to lock and load with my tips.
Continue reading: